






From the sun-scorched canyons of the Sonoran Desert to our sunlit living room windowsills, cacti are nature’s most resilient architectural survivors. In their native habitats, stems torn off by gale-force storms, pads snapped by roaming wildlife, or cladodes dropped under drought-induced stress do not wither and die when they strike the arid earth. Instead, they activate a dormant cellular resurrection—sprouting adventitious roots to establish a genetically identical clone plant. This phenomenal evolutionary adaptation forms the exact scientific foundation for the art of growing a cactus from a cutting in cultivation.
Let us settle the burning horticultural question directly from a botanical standpoint: Yes, when executed with physiological precision, virtually all columnar and pad-forming cacti can be successfully propagated from a single severed cut! However, this delicate undertaking is fundamentally different from snipping an everyday houseplant and dropping it into a glass of water. A cactus’s succulent parenchyma tissue stores massive hydraulic reserves; an unmanaged, wet cut in an unsterilized environment is an open invitation for lethal opportunistic fungal pathogens.
In this master guide, we explore the cellular secrets of cactus propagation with the warm, encouraging tone of two seasoned nurserymen sharing morning coffee, paired with the uncompromising rigor of a university botanical lab. Are you ready to journey from the initial surgical incision to the emergence of the very first crisp white adventitious root tips?
1. Taxonomic Identity, Areole Architecture, and Spine Morphology
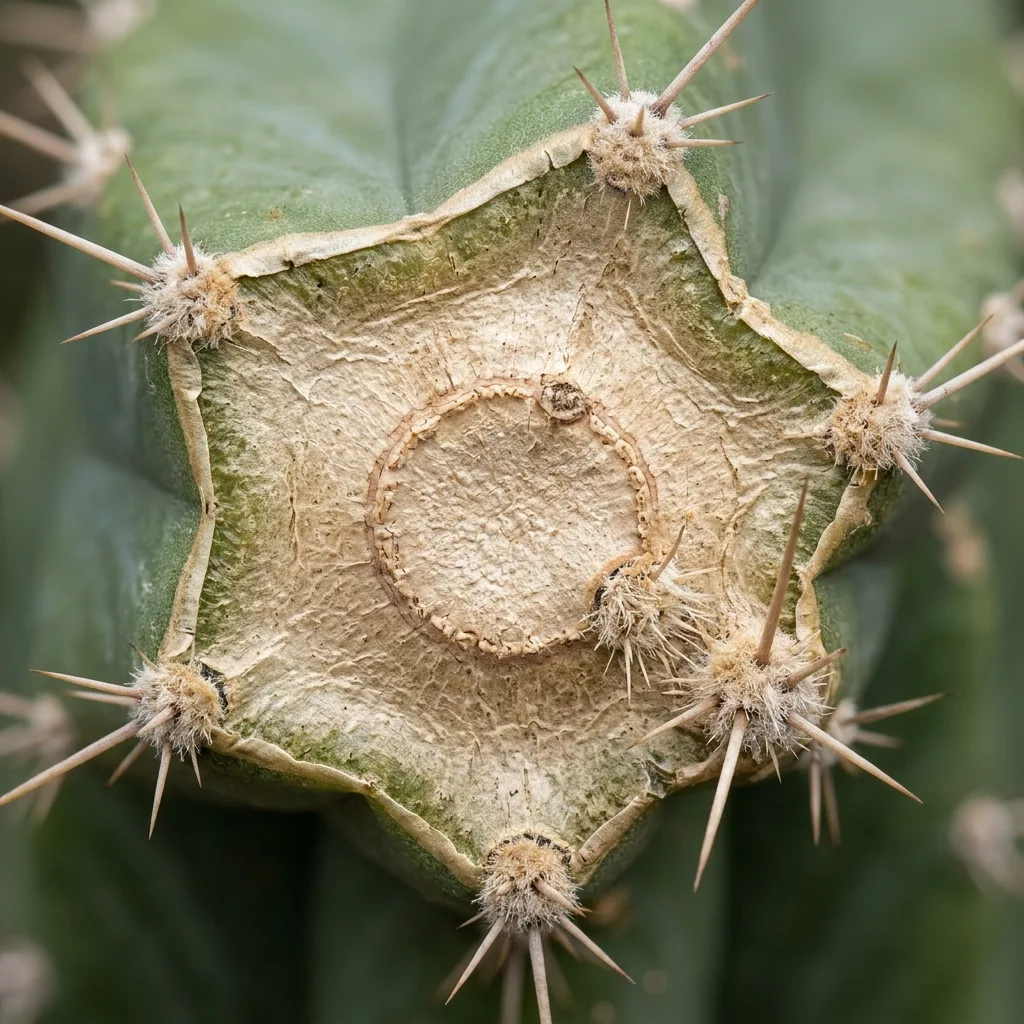
The botanical secret to regenerating an entire cactus specimen from a severed cutting lies in the single diagnostic anatomical structure that separates the family Cactaceae from every other succulent group on Earth: the areole. Areoles are specialized, condensed lateral meristematic nodes—evolutionarily modified axillary buds unique to cacti. When you sever a healthy cutting, it is from the depths of these exact areolar centers that new roots and future lateral offshoots (pups) will emerge.
In true desert cacti (such as Trichocereus, Opuntia, and Echinopsis), areoles are heavily protected by dense trichomes (woolly structural hairs) and fortified with spines calcified by crystalline mineral deposits. Far from being merely defensive armor against herbivores, these spines act as intricate microclimatic shelters: they diffuse severe solar radiation, create a still boundary layer of air that minimizes transpirational moisture loss, and shield sensitive meristematic zones. Conversely, in epiphytic jungle cacti (such as Epiphyllum or Schlumbergera), spines are vestigial or entirely reduced to soft bristles. Cuttings from these forest species develop callous tissue much faster than thick desert species, yet their thinner cuticles leave them considerably more vulnerable to rapid tissue desiccation.
2. Light Spectrum, Solar Intensity, and Airflow Dynamics
Because a newly severed cutting possesses zero roots, it has no physiological pathway to absorb replacement water from the soil. Exposing this rootless cutting to blistering direct midday ultraviolet radiation will overwhelm its cellular defenses; even a thick, waxy epicuticular farina cannot prevent severe chlorophyll photodegradation (sunburn) and irreversible desiccation. The gold standard for rooting cuttings is bright, filtered indirect ambient daylight accompanied by continuous, gentle ambient ventilation.
Providing 12 to 14 hours of soft, indirect daylight ensures the cutting sustains baseline CAM metabolic turnover without depleting its internal moisture reserves. Fresh airflow, meanwhile, serves as an invisible shield, accelerating boundary layer drying and preventing airborne fungal spores from settling on wounded tissue. In stagnant, humid rooms, cuttings fall prey to bacterial liquefaction long before root primordia can trigger. A steady, gentle breeze also imparts microscopic mechanical stress, sending subtle hormonal signals through the stem that prompt the plant to anchor itself.
3. Irrigation Protocols and Critical Dormancy Dynamics
Watering a freshly potted cactus cutting immediately upon planting is the single most catastrophic mistake in arid horticulture. A rootless cutting cannot uptake moisture; saturated substrate simply smothers the wounded tissues and induces anaerobic rot. Cultivating cacti from cuttings demands a disciplined, two-stage hydraulic protocol:
- The Callus & Dry Healing Phase: The excised section must remain completely dry in a warm, shaded, well-ventilated space until the cut wound undergoes full suberization—forming a firm, leathery, grayish-white layer of corky cellular tissue (taking anywhere from 1 to 3 weeks depending on stem diameter).
- The Root-Stimulating Moisture Pulse: Once callused and set into bone-dry mineral grit, provide subtle bottom-wicking or a light surface mist around the perimeter of the pot once a week to guide exploratory root growth downward. Never pour standing water directly over the stem tissue.
During winter dormancy (roughly November through February in temperate zones), desert cacti enter a state of metabolic rest, minimizing CAM photosynthesis and vegetative activity. Taking cuttings during this resting window is ill-advised. The ideal propagation window aligns with the spring flush and early summer, when endogenous auxin titers peak and vascular regeneration proceeds at full speed.
4. High-Mineral Substrate Composition and Pot Selection
Standard organic peat moss is the primary vector for root rot when propagating cuttings. Rootless stems demand abundant interstitial pore space and maximum gas exchange. To ensure rapid, unhindered elongation of newly formed xylem tissue, your rooting medium should consist of at least 70% to 80% inorganic porous minerals by volume. Plastic containers should be replaced with unglazed, highly porous terracotta pots equipped with wide, unrestricted drainage apertures.
| Mineral Component | Recommended Ratio | Horticultural Function & Botanical Benefit |
|---|---|---|
| Horticultural Pumice (3–5 mm) | 40% | Creates high macro-porosity, optimizes oxygenation around the basal plate. |
| Crushed Lava Rock / Zeolite | 25% | Binds micronutrients, regulates micro-moisture, and creates an antifungal matrix. |
| Coarse Horticultural Quartz / River Grit | 15% | Accelerates gravitational water drainage and mechanically anchors top-heavy stems. |
| Sieved Coconut Coir (Washed) | 20% | Supplies a bare minimum of capillary humidity to prevent delicate root tips from crisping. |
5. Inducing Future Blooms and Nutrient Management
During its initial post-rooting season, your young cactus directs virtually all metabolic energy toward establishing an anchored root system and expanding vegetative parenchyma tissue. However, starting in its second full season, well-established plants can be coaxed into setting floral buds. Prolonged, vibrant blooming is rarely the result of excessive chemical feeding; rather, it is initiated by a distinct, cool, dry winter rest period.
As the active growing season resumes in spring, you may support mature cuttings with a low-nitrogen, high-phosphorus, and potassium liquid fertilizer (such as an NPK 4-10-10 ratio) diluted to quarter strength. High nitrogen concentrations force weak, watery cellular expansion that is prone to pest incursions and fungal rupture, whereas balanced phosphorus encourages floral primordia formation inside the mature areoles.
6. Step-by-Step Surgical Propagation and Grafting Alternatives
Harvesting and rooting a cactus cutting requires clinical precision. Follow this standard operating procedure to maximize success:
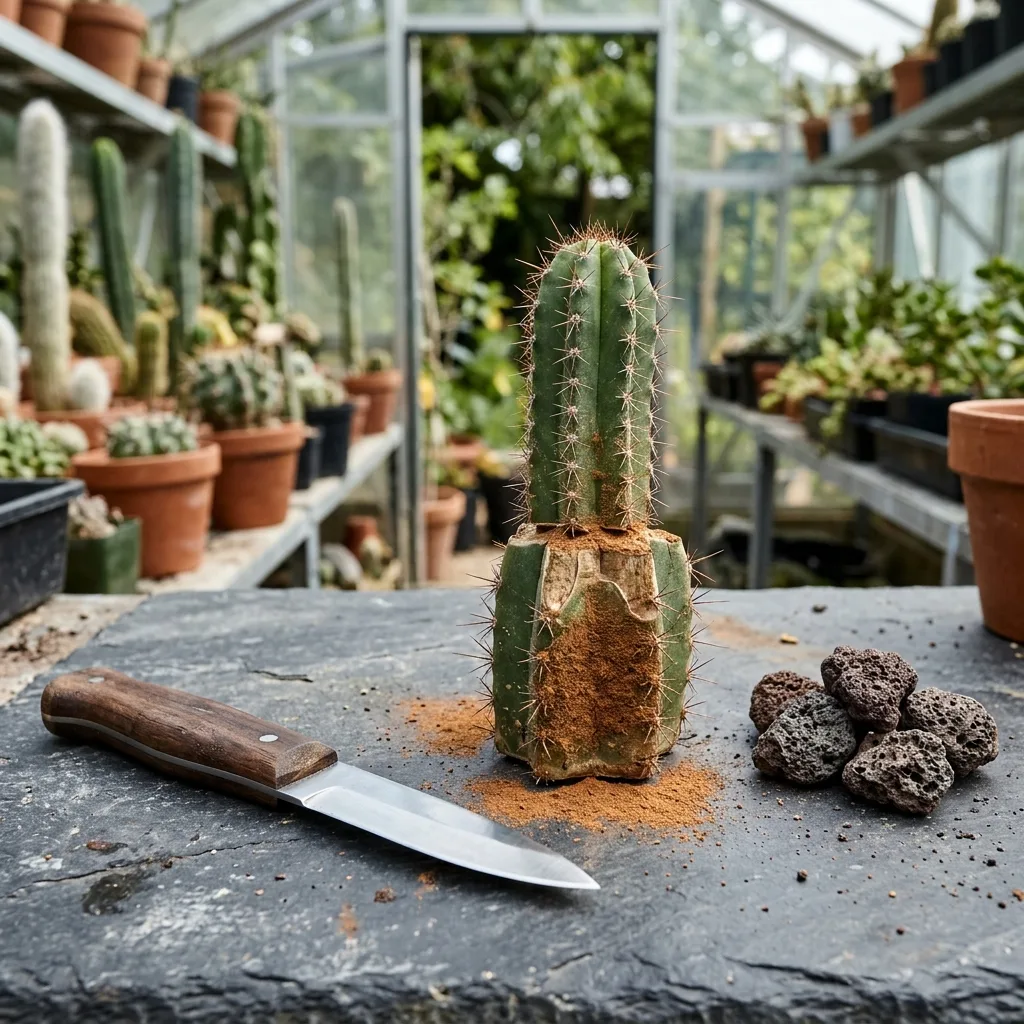
- Tool Sterilization: Disinfect your scalpel or straight-edge horticultural knife with 70% isopropyl alcohol. Avoid dull shears, which crush the vascular cylinder.
- Precise Cutting Angle: Make a clean, single-pass cut. For thick columnar cacti, bevel the outer fleshy margin slightly (creating an inverted cone shape). Because the core vascular cylinder contracts slower than the outer parenchyma as it dries, beveling prevents the center from forming a concave cup that traps moisture.
- Suberization (The Vital Step): Dust the fresh cut with sulfur powder or natural organic cinnamon (a mild natural antifungal). Lay the cutting horizontally across dry, clean paper towels in a shaded, ventilated space for 7 to 14 days. The basal tissue must transform into a tough, dry, impenetrable, pale rind.
- Potting and Mechanical Support: Rest the callused base only 2 to 3 cm deep into the bone-dry mineral mix. Do not bury the stem deep into the medium; if the cutting is top-heavy, stabilize it with clean volcanic rocks or support stakes.
- Grafting Alternative: For exceptionally slow-growing, fragile, or chlorophyll-deficient species (such as neon-colored Gymnocalycium mihanovichii forma rubra), severed scions can be grafted directly onto a vigorous rootstock like Hylocereus undatus to accelerate nutrient transfer.
7. Defending Against Fungal Pathogens and Basal Stem Rot
The primary fungal antagonists encountered during cutting propagation are Fusarium oxysporum, Phytophthora cactorum, and Pythium species, all of which induce rapid vascular collapse. If an uncallused or damaged cutting touches damp, biologically active soil, the base turns black, softens into mush, and yields an unpleasant odor within days. Immediate emergency surgery is the only path to salvation.
When rot appears, slice through the stem at least 2 to 3 cm above the highest visible discoloration. Examine the exposed cross-section: the central ring of vascular bundles must be immaculate, pale, and entirely free of brown, orange, or black necrotic staining. Continue making thin serial slices upward with a newly sterilized blade until only pristine, healthy green and white tissue remains. Treat the freshly cut surface with pure sulfur, and restart the callous drying process from day one.


Reader Reviews & Comments 4 Reviews
Julian Vance
Clara Higgins
Eleanor Sterling
Marcus Thorne
Leave a Review & Rating
Share your plant care tips, experiences, or questions with our succulent community.