






While tomatoes and peppers wilt and curl their foliage under the blistering July sun due to severe water stress, a remarkable group of plants thrives quietly in Mediterranean-style kitchen gardens: edible succulent vegetables. When avid gardeners ask, 'What can you harvest in the heat of midsummer?', classical crops often spring to mind, yet our most heat-tolerant culinary treasures—purslane (Portulaca oleracea), tender prickly pear cactus pads or nopales (Opuntia ficus-indica), and crystalline ice plant (Mesembryanthemum crystallinum)—reach their peak nutritional density during these scorching weeks. Even better, the harvesting process for these fleshy greens doubles as an outstanding vegetative propagation opportunity.
Bridging harvest and propagation brings the raw developmental power of the apical meristem and plant auxin hormones straight from your greenhouse into your kitchen. The very stem cuttings of purslane or nopal you trim off for dinner can transform into vigorous, independently rooted plantlets within 7 to 14 days when managed with precise cellular callusing and rooting protocols. In this guide, we dive deep into the botanical mechanics that turn your midsummer vegetable harvest into an abundant propagation cycle.
1. Botanical Foundations of the Propagation Method
The most dependable and rapid vegetative method for multiplying succulent vegetables in high summer is terminal (apical) and lateral stem cutting. The primary meristematic tissue clustered at the shoot tip maintains apical dominance through downward auxin flow. Removing the apical bud disrupts this flow—a botanical phenomenon known as breaking apical dominance. This triggers dormant axillary buds on the mother plant to produce multiple vigorous lateral shoots, while totipotent cells within the harvested cutting initiate adventitious root primordia.
The cellular vacuoles of edible succulents store substantial reserves of water and organic acids (notably malic acid produced via Crassulacean Acid Metabolism, or CAM). This high turgor pressure shields freshly severed stems from immediate dehydration shock; however, exposed moist parenchyma tissue is intensely susceptible to bacterial pathogens. Success hinges entirely on helping the severed cutting synthesize a protective cellular barrier before planting.
2. Essential Sterile Equipment and Mother Plant Preparation
Executing successful vegetative propagation calls for surgical cleanliness. High water content inside succulent tissues creates a banquet for opportunistic soil-borne microbes if sterile practices are overlooked.
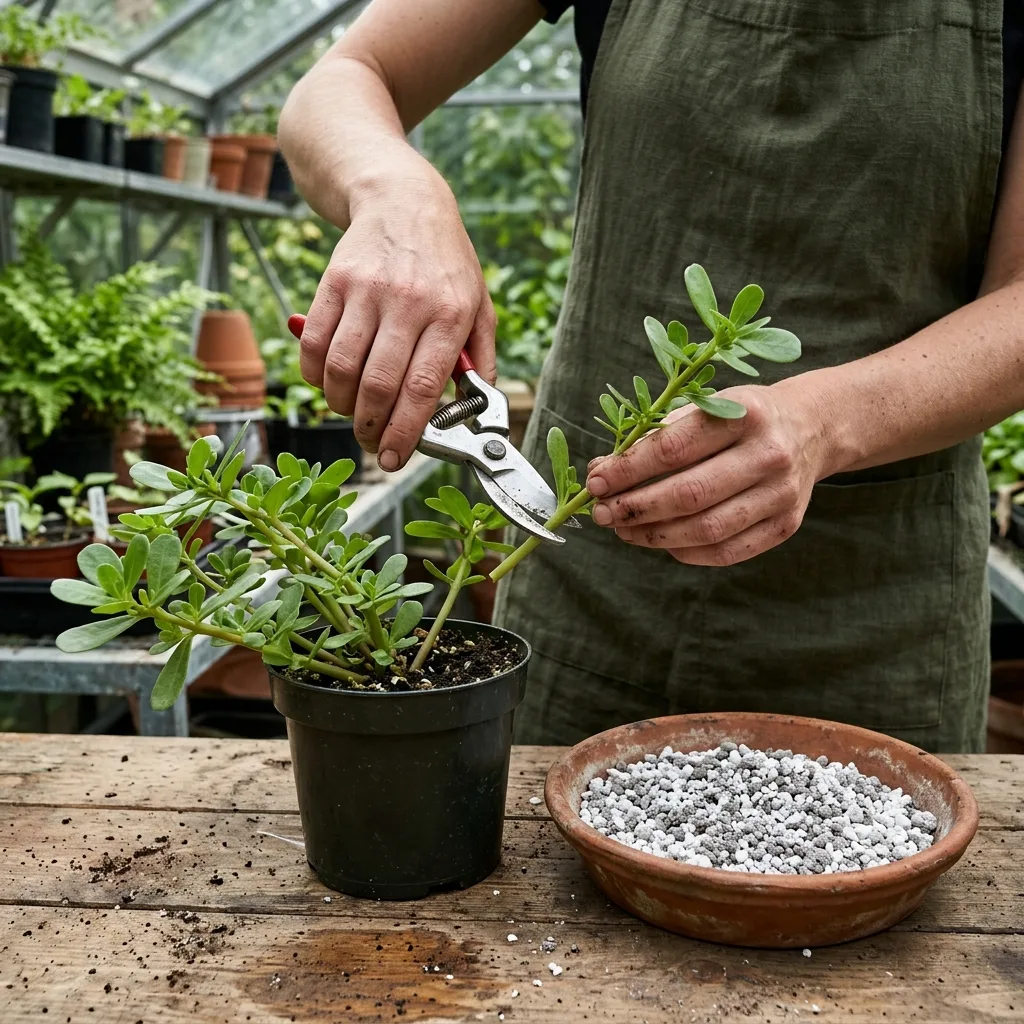
- Cutting Tools: Bypass pruning shears with a clean, smooth edge or a sterile stainless steel surgical scalpel. Avoid serrated blades, as they crush vascular bundles and cause localized necrosis.
- Disinfection Solution: 70% isopropyl alcohol or a 1:10 dilution of household bleach. Sterilize blade surfaces thoroughly before and between successive cuts.
- Protective Fungicidal Powder: Pure powdered cinnamon or horticultural dusting sulfur to coat severed tissues against fungal spores.
- Mother Plant Pre-Hydration: Deeply water the mother plant at the root zone 24 to 48 hours before harvesting. Turgid, well-hydrated parent tissues endow the cutting with the metabolic reserves needed during its rootless phase.
3. Step-by-Step Cutting and Callusing Protocol
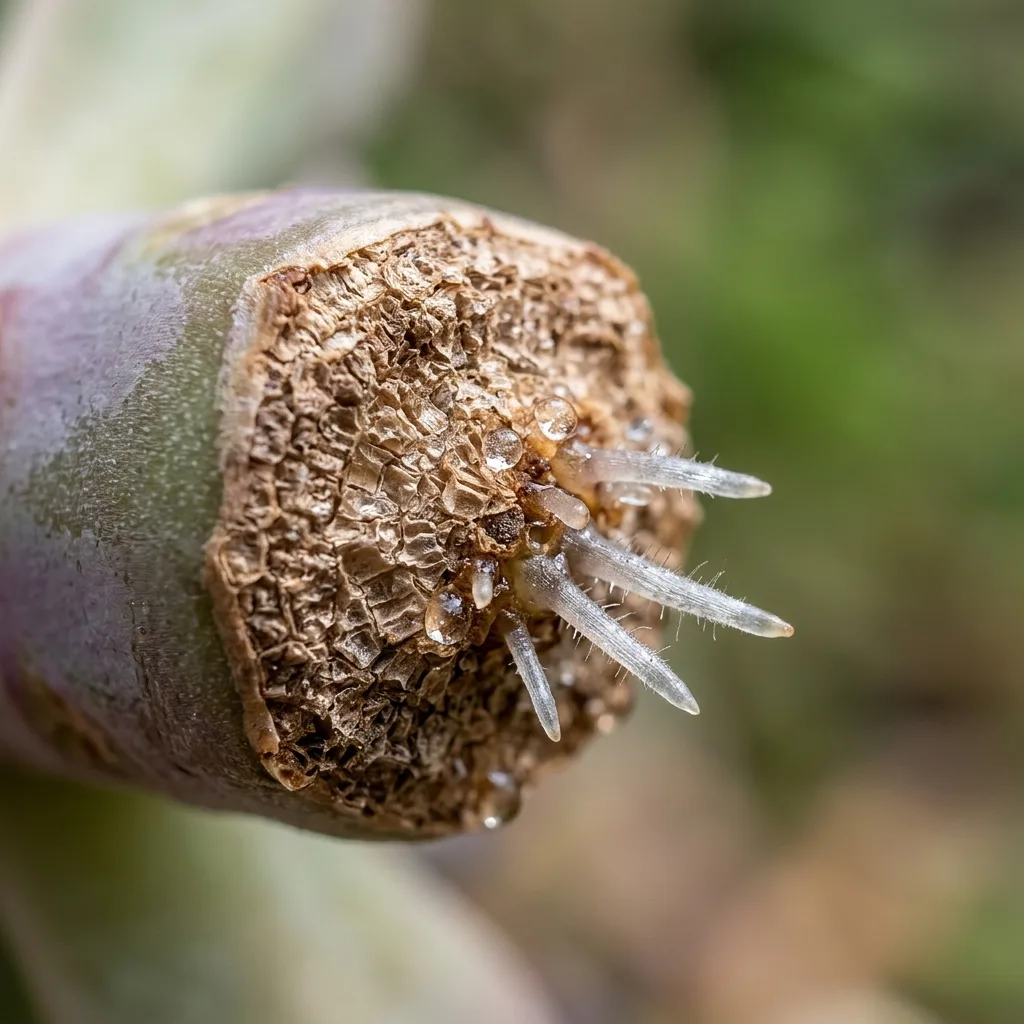
The firm, lower stem segments situated beneath the succulent leaves you harvest for cooking hold the architectural blueprint for new plants. Planting freshly cut purslane or cactus pads straight into damp soil like common soft leafy herbs is the quickest route to stem rot.
- Severing at the Correct Node: For purslane, select robust apical shoots 8–12 cm in length containing at least 3–4 nodal rings. For nopal cactus, cleanly detach tender, bright green cladodes under one year old precisely at the basal joint using a sterilized scalpel.
- Basal Foliage Removal: Carefully snip off leaves from the lower 3–4 cm of the stem using shears, taking care not to gouge the stem cortex with fingernails.
- Callus Formation: Never plant cuttings immediately. Place them on an elevated drying screen in a well-ventilated, shaded, and warm location (22–26°C / 72–79°F). Purslane requires 12 to 24 hours of curing, whereas thick, mucilaginous nopal cactus pads require 3 to 5 full days to develop a sturdy, suberized barrier.
4. Ideal Rooting Media and Substrate Selection
Developing root initials require exceptional gas exchange. Substrates that retain stagnant water suffocate emergent root primordia by starving them of interstitial oxygen.
| Substrate / Method | Rooting Speed | Rot Risk | Root Quality & Establishment |
|---|---|---|---|
| Pure Fine Pumice (1–3 mm) | Very Rapid (6–9 Days) | Very Low (2%) | Extremely robust root hairs; zero transplant shock. |
| Perlite + Coco Coir (50/50) | Rapid (7–10 Days) | Low (5%) | Excellent moisture buffering; extends watering intervals. |
| Standard Garden Topsoil | Slow (14–20 Days) | High (35%) | Heavy clay compresses root meristems; high risk of rot. |
| Water Culture (Open Jar) | Rapid (5–7 Days) | Moderate (15%) | Produces brittle aquatic roots that struggle upon transfer to soil. |
For midsummer rooting, shallow nursery flats filled with fine pumice or coarse horticultural perlite deliver unmatched stability. Inserting callused stems 2–3 cm into this porous matrix anchors the cutting while keeping moisture present around the nodes without waterlogging the stem base.
5. Balancing Light, Temperature, and Humidity During Rooting
Without functional xylem pathways to pull water from the soil, fresh cuttings are vulnerable to dehydration under aggressive summer sun. You must establish a gentle microclimate that curtails transpirational water loss.
Never expose rootless cuttings to harsh midday sun. Bright indirect light filtered through lightweight shade cloth (50% block) or sheer fabric is ideal. Ambient temperatures should hover between 22°C and 28°C (72–82°F); prolonged heat above 32°C (90°F) signals the cutting to enter heat dormancy rather than expend energy on adventitious rooting. Do not drench the propagation bed—simply mist the surface with a fine sprayer in the early morning to sustain atmospheric humidity around the foliage.
6. Potting Up and Acclimating Rooted Cuttings
After roughly 10 to 14 days, gently tug upward on the base of the stem. If you encounter elastic resistance, subterranean adventitious roots have successfully anchored into the substrate. Your young edible greens are now ready for individual potting containers or garden beds.
At this stage, you can enrich the growing medium with organic matter. A blend of 40% aged compost or worm castings, 40% pumice/perlite, and 20% garden soil provides the sustained nutrients needed for lush, fleshy leaves. Keep newly potted plantlets in bright shade for the first 4 days, then gradually introduce them to direct morning sunlight by adding one hour of direct exposure daily (hardening off).
7. Troubleshooting Failures and Rescue Tactics
If cuttings turn blackened, translucent, or soft at the soil line, excessive moisture and poor aeration are the culprits. If the upper growth tip is still vibrant and turgid, you can save it: slice off the decaying basal section 1 cm into healthy green tissue using a fresh sterile scalpel. Dust the cut with cinnamon, allow it to recallus in dry shade for 48 hours, and reset it into 100% dry pumice.
Slight lower leaf yellowing or shedding is normal as the cutting redirects starch and nitrogen reserves toward root initiation. As long as the central vascular stem remains firm and green, new vegetative flushes will erupt as soon as functional root systems take hold.


Reader Reviews & Comments 4 Reviews
Eleanor Vance
Marcus Sterling
Sarah Jenkins
David Thorne
Leave a Review & Rating
Share your plant care tips, experiences, or questions with our succulent community.