






Tucked away among the arid scrublands and rocky outcrops of South Africa’s Eastern Cape, the Silver Squill (Ledebouria socialis) stands out as one of the most intriguing geophytes in the botanical universe. Naturally adapted to survive within shaded rock crevices and semi-arid savanna undergrowth, its distinctive tear-shaped, purplish bulbs function as specialized storage reservoirs, stockpiling cellular water and nutrients against long stretches of merciless drought. When cultivating this charismatic species indoors or on a sheltered patio, the single most devastating mistake is to bury it deep beneath the soil like a typical garden bulb and overwhelm it with overly enthusiastic care.
Developing a genuine kinship with your Ledebouria starts with honoring its ancient evolutionary physiology. While the leopard-mottled silvery foliage looks like hand-painted living art, the true biological engine sits in the fleshy, exposed pseudobulb anchored half-above the ground. Let us explore, through precise horticultural science, how to safeguard its cellular turgor, eliminate the risk of pathogenic rot, and nurture this South African gem into an opulent, thriving colony.
1. Botanical Biology and Physiological Foundations
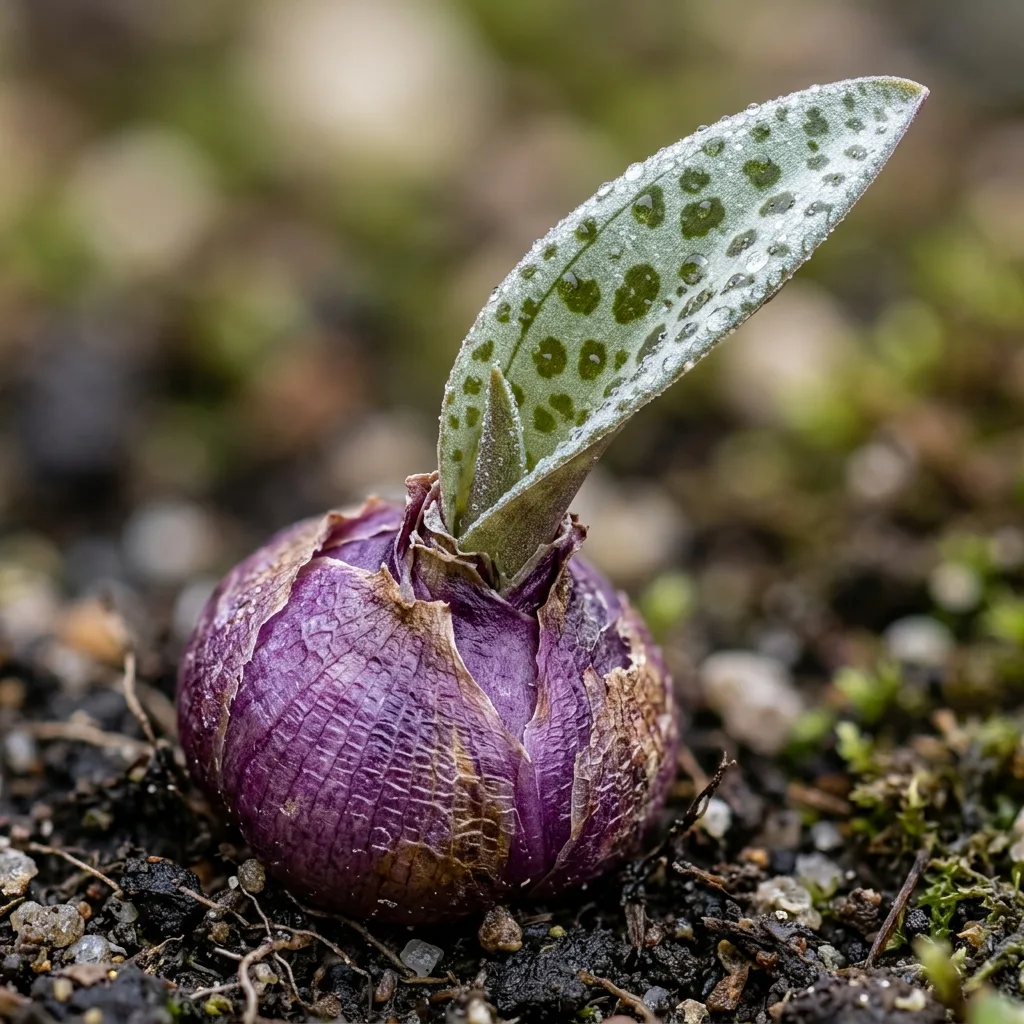
Ledebouria socialis (formerly classified as Scilla socialis) is a bulbous, deciduous-to-evergreen succulent geophyte belonging to the family Asparagaceae. Its primary morphological hallmark is the clustering arrangement of scale-layered, purple-green pseudobulbs. These specialized aerial organs are densely packed with water-storing parenchyma cells that keep the plant fully hydrated during extended droughts. Unlike traditional underground bulbs such as tulips or daffodils, Ledebouria bulbs participate actively in photosynthesis; thanks to chloroplasts nested within their exposed epidermal tissue, the bulbs themselves synthesize carbohydrates directly from ambient light.
The plant’s lanceolate leaves are coated with a reflective silvery veneer—a complex matrix of epicuticular waxes and light-scattering cellular layers. This silver surface deflects harsh thermal radiation, mitigates leaf-tissue overheating, and reduces water loss through transpiration to an absolute minimum. Beneath the surface, the root system consists of coarse, fibrous xylem vessels that demand continuous aeration. The moment the bulb’s basal plate is deprived of oxygen or immersed in waterlogged soil, cellular lysis occurs, creating an open gateway for opportunistic fungal pathogens such as Fusarium and Pythium. Maintaining non-stop airflow around the subterranean-to-aerial transition zone is the paramount rule for its physiological longevity.
2. Diagnostic Symptoms and Plant Signals
Ledebouria socialis is an exceptionally expressive succulent that communicates cultivation imbalances with rapid visual feedback. By periodically inspecting leaf turgor and bulb firmness, you can calibrate your care routine proactively:
- Shriveled or Spongy Bulbs: When a gentle squeeze reveals that the bulb has lost its firmness and feels deflated, the plant has exhausted the water reserves in its parenchyma tissue. If the substrate is bone dry, this is an unequivocal signal for a thorough, saturating drink.
- Etiolation and Loss of Silvery Mottling: Inadequate light intensity triggers elongated, weak leaf stems and prompts the foliage to turn a dull, uniform dark green as the silver leopard spots fade away. This clearly indicates that the plant needs immediate relocation to a brighter position.
- Crispy Brown Leaf Tips and Premature Leaf Drop: This symptom occurs when ambient humidity drops excessively or when the substrate remains desiccated far beyond the plant's natural threshold, causing the terminal xylem pathways to desiccate.
- Blackened, Soft Basal Plate: The most dangerous signal of all. Softening or blackening at the junction where the bulb meets the root system marks an active fungal infection caused by chronic moisture retention. Without rapid intervention, the entire cluster can collapse.
3. Step-by-Step Cultivation Protocol
To transform your Silver Squill into a lush, multifaceted colony bursting with healthy offsets, follow this precise step-by-step planting and management sequence:
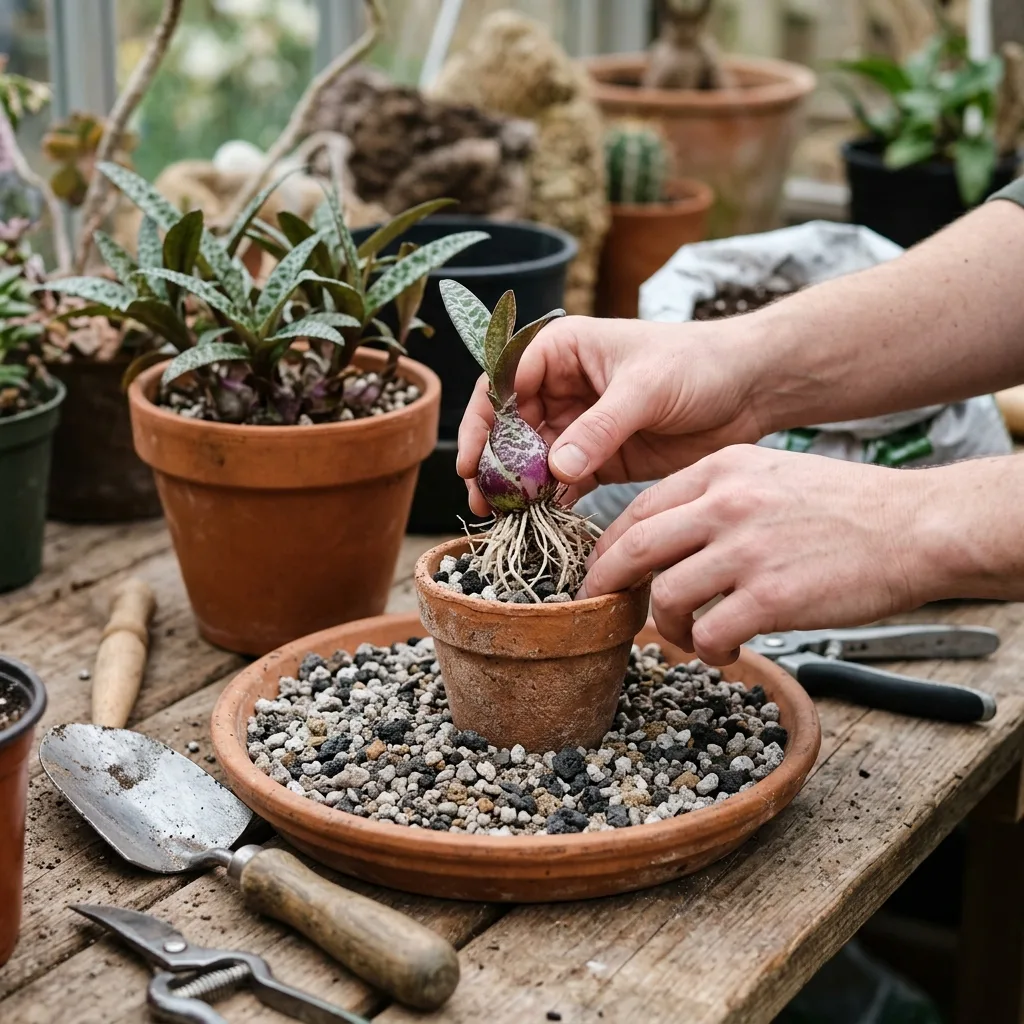
- Container Selection and Drainage Architecture: Because their root systems spread horizontally rather than plunging deep, choose wide, shallow planters (such as unglazed terracotta succulent bowls or bonsai pots) over deep containers. The vessel must feature several open drainage holes. Unglazed terracotta is unmatched here, as its porous walls breathe and evaporate excess moisture swiftly.
- Substrate Layering: Spread a 1–2 cm layer of coarse pumice or crushed lava rock across the bottom of the container. Fill the remainder with a sharply draining, high-porosity mineral substrate blend.
- Positioning the Bulbs: Seat the bulbs gently onto the surface, pressing them just enough so that the root flare and the bottom one-third of the bulb are settled into the mix. The remaining upper two-thirds must remain exposed to direct air and light.
- Post-Potting Settling and Location: Do not water immediately after planting. Allow 2 to 3 days for any micro-tears in the roots to form protective wound calluses. Place the pot in a warm environment receiving ample bright, indirect light or soft morning sun (an east-facing windowsill is ideal).
- Watering Protocol: During the active vegetative growth phase (spring and summer), hydrate deeply only after the entire substrate volume has dried completely. Empty all drainage runoff from the saucer within 15 minutes to prevent capillary back-saturation.
4. Essential Equipment, Substrate Ratios, and Parameters
| Parameter / Component | Recommended Specification | Horticultural Rationale & Function |
|---|---|---|
| Mineral Substrate Blend | 40% Pumice + 20% Lava Rock + 10% Zeolite + 30% Organic Cactus/Coir Base | Guarantees rapid drainage, oxygenates root xylem, and eliminates perched water tables. |
| Light Exposure | 4–6 hours of bright, filtered sunlight daily (gentle morning sun tolerated) | Promotes thick epicuticular leaf wax and intensifies the contrast of the leopard patterning. |
| Temperature Range | 15°C to 28°C (Absolute winter minimum: 7°C / 45°F) | Supports continuous cell division during the warm season; absolute frost protection is vital. |
| Watering Frequency | Spring/Summer: Every 7–10 days (post dry-out); Winter: Every 20–30 days | Emulates natural drought-wet cycles, preserving elasticity in bulb parenchyma cells. |
| Fertilization Protocol | Monthly with quarter-strength balanced succulent formula (Low N, High K) | Strengthens cellular walls and basal plates without stimulating leggy, watery foliage. |
5. 5 Common Pitfalls and Emergency Recovery Protocols
Even seasoned collectors occasionally slip up with geophytes. Here are the five most frequent cultivation mistakes and the exact methods to reverse them:
- Mistake: Planting the Bulbs Too Deeply.
Remedy: Unpot the specimen immediately. Inspect the base and excise any mushy scales or dead roots using a sterilized scalpel. Dust the cleaned wound with fungicidal sulfur or cinnamon powder, allow the bulb to dry in the shade for 24 hours, and remount with at least half the bulb exposed above ground. - Mistake: Maintaining Summer Watering Throughout Winter.
Remedy: Shorter daylight and cooler temperatures shift Ledebouria into semi-dormancy. Continuous soaking during this period brings on rapid crown rot. Cease watering immediately, move the container to a bright, well-ventilated location, and let the soil dry thoroughly before assessing root health. - Mistake: Over-Fertilizing in Low-Light Settings.
Remedy: Excess nitrogen under dim lighting causes floppy, weak foliage that sheds its characteristic spots. Flush the pot with clear water to leach excess salts, halt fertilization entirely, and transition the plant into substantially brighter, filtered sunlight. - Mistake: Foliar Misting.
Remedy: Misting is unsuitable for xerophytic bulbs. Lingering water droplets damage the protective leaf wax and harbor fungal blight. Gently blot moisture off the leaves with a dry microfiber cloth and place the plant near a light fan to restore clean airflow. - Mistake: Using Oversized Pots.
Remedy: A vast potting volume holds more moisture than the root mass can process, prolonging dampness for weeks. Ledebouria thrives when gently root-bound. Downsize your plant to a shallow container no more than 2–3 cm wider than the collective bulb cluster.
6. Seasonal Management and Long-Term Results
Ledebouria socialis operates on a defined seasonal rhythm. Respecting this biological calendar will reward you with an expansive specimen overflowing with offsets year after year:
- Spring (Awakening and Bloom): Active growth resumes in March. The plant produces delicate racemes bearing tiny, bell-shaped green and white blossoms with purplish stamens. Gradually resume standard watering, introduce a diluted nutrient dose once a month, and watch for active daughter bulb formation around the perimeter.
- Summer (Peak Vegetative Expansion): Foliage density peaks under high light and warm temperatures. Water deeply whenever the soil dries completely. If kept outdoors on a sheltered veranda with filtered light, the foliage colors and metallic sheen reach maximum vibrancy.
- Autumn (Consolidation and Division): As temperatures begin to cool, cease fertilizing and space out watering sessions. September and October are the ideal months for dividing crowded clumps and potting up daughter offsets into individual containers.
- Winter (Semi-Dormant Rest): Water very sparingly—just enough (once every 3 to 4 weeks) to keep the bulbs from severely shriveling. Maintain the pot in a cool (10–15°C / 50–59°F), well-lit room away from freezing drafts. This restorative cool rest is the natural trigger for abundant flowering and vigorous pup development the following spring.


Reader Reviews & Comments 3 Reviews
Eleanor Vance
Julian Thorne
Marcus Sterling
Leave a Review & Rating
Share your plant care tips, experiences, or questions with our succulent community.