






From the windswept ravines of Mexico to the arid Karoo plateau of South Africa, succulents have evolved over millennia to conquer nature's harshest rocky fissures and water-deprived landscapes. The resilient specimens we welcome into our living spaces are by no means fragile; on the contrary, they most often fall victim to misdirected, excessive 'love.' Whether repotting a freshly acquired Echeveria rosette, rooting a petite Sedum cutting, or sizing up an outgrown Crassula, a single misstep during planting can cause cellular collapse and melt your prized specimen in mere days.
Planting a succulent is an entirely distinct botanical philosophy from burying a tropical houseplant in dense peat and drenching it with water. These specialized drought survivors store massive water reserves within their succulent tissues, despise persistent moisture around the root crown, and crave oxygen around their root hairs far more than soil fertility. If you are eager to leave behind the heartbreak of translucent, mushy leaves and instead root your succulents on a rock-solid physiological foundation, welcome to our greenhouse-proven potting protocol.
1. Botanical Identity and Morphological Foundations
The term 'succulent' does not designate a single botanical family. Instead, it encompasses an evolutionary adaptation shared across numerous distinct families—most notably Crassulaceae, Asphodelaceae, Apocynaceae, and Cactaceae—each having evolved thickened vegetative organs to store moisture. Central to their water-conservation arsenal is CAM (Crassulacean Acid Metabolism) photosynthesis. To prevent catastrophic transpirational water loss during scorching days, these plants seal their stomata tightly throughout daylight hours, opening them exclusively under cool night conditions to assimilate and store carbon dioxide as malic acid.
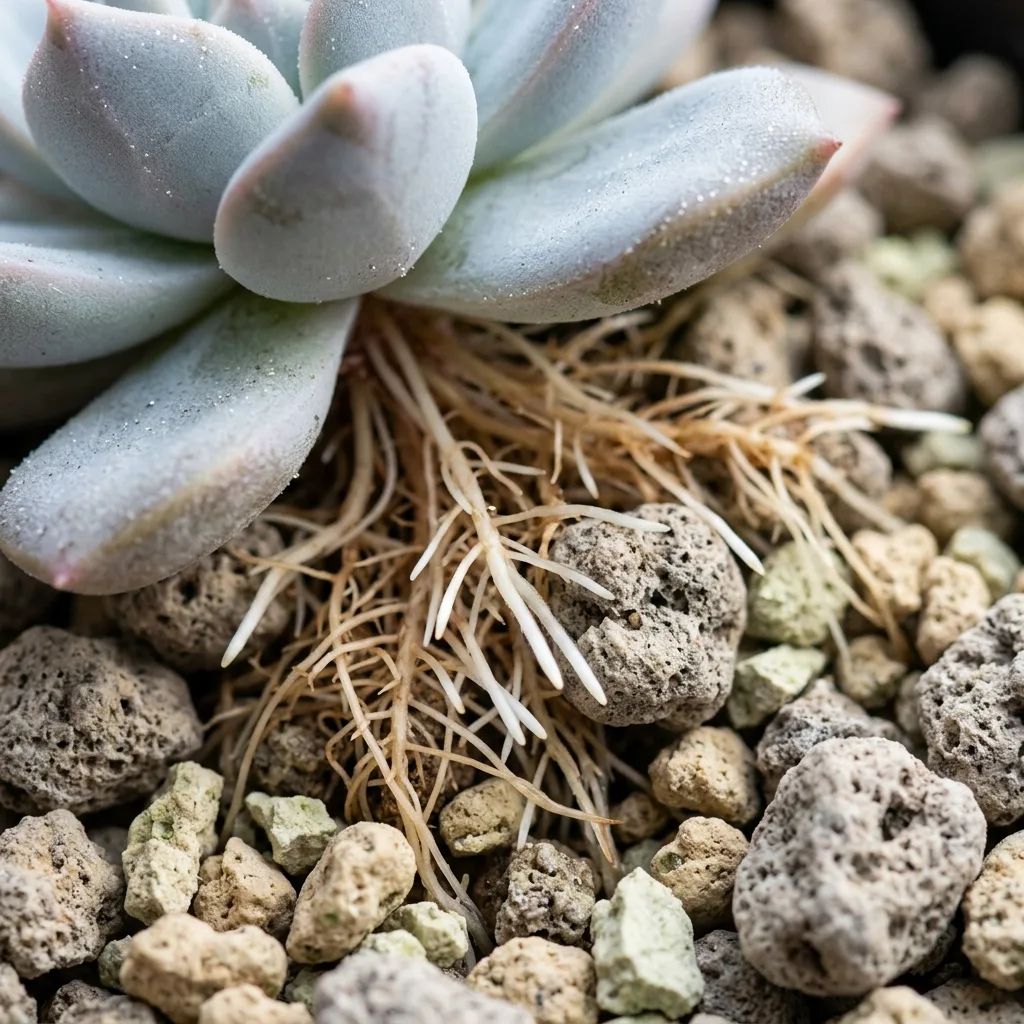
Morphologically, succulents develop predominantly shallow, fibrous root systems. Specifically adapted to capture ephemeral desert precipitation from the uppermost soil layers within moments, these microscopic root hairs quickly suffer cellular asphyxiation and die of anoxia when trapped in dense, waterlogged potting soils. Above ground, many rosettes secrete a delicate, powdery epicuticular wax layer known as farina. Functioning as a broad-spectrum botanical sunscreen, water repellent, and pathogen shield, this wax does not regenerate once rubbed off. Handling the plant by its root flare rather than touching the leaves is critical to safeguarding this protective barrier.
2. Light Acclimation and Indoor Positioning
A newly potted succulent experiences substantial mechanical stress resulting from root manipulation, substrate clearing, and environmental relocation. A frequent error among home growers is immediately placing a freshly repotted succulent under blazing midday sun, assuming it 'adores full light.' With microscopic root hairs temporarily torn or disrupted, the plant cannot draw moisture to replace what it transpires, resulting in rapid tissue desiccation, shriveling, and irreversible epidermal scorch.
For the initial 7 to 10 days post-potting, locate your succulent in an area receiving abundant, bright, yet filtered or indirect sunlight—such as behind a sheer curtain near a south- or east-facing exposure. Once root integrity is re-established and leaves maintain full turgor pressure, gradually introduce the plant to morning or late-afternoon direct sunlight. If provided insufficient light, the plant will rapidly undergo etiolation—producing pale, elongated stems and widely spaced, weakened leaves as it expends stored carbohydrates stretching toward a light source.
3. Watering Discipline: The 'Soak and Dry' Protocol
The golden rule of succulent planting is absolute: Never apply settling water (can suyu) immediately after potting! While traditional gardening doctrine dictates saturating the root ball right after transplanting, doing so with succulents is an outright death sentence. Root systems inevitably sustain micro-abrasions and structural tears during handling. When open botanical wounds encounter saturated substrate, anaerobic fungal pathogens—specifically Pythium and Fusarium—rapidly penetrate the vascular bundle, inducing lethal stem rot.
Leave the substrate completely bone-dry for at least 5 to 7 days after potting. This latency window allows cellular suberization and callus formation over microscopic root tears. When you initiate the first irrigation, adhere strictly to the 'Soak and Dry' method. Saturate the potting medium thoroughly until water flows unhindered from the drainage holes, ensuring every particle of the porous aggregate absorbs moisture. Crucially, empty any pooled runoff from the catch tray within 10 to 15 minutes. Before watering again, insert a wooden skewer or probe to the bottom of the pot to confirm that moisture levels have dropped to absolute zero. Frequent, small waterings do not nourish a succulent; they smother its root respiration.
4. Ideal Substrate Formulation and Pot Selection
The physiological vigor of any succulent is directly correlated with gas exchange and macro-porosity throughout the rhizosphere. Standard garden soil or pure commercial peat moss acts like a sodden sponge, suffocating root tissue and welcoming rot. A professional succulent substrate must discharge gravity water within seconds, maintain permanent structural integrity without compacting, and incorporate a minimum of 60% to 70% coarse, porous inorganic minerals by volume.
Regarding container material, unglazed terracotta remains the gold standard because its micro-porous ceramic walls permit bilateral gas exchange and lateral moisture evaporation. Plastic and glazed ceramic vessels retain internal moisture significantly longer, requiring even grittier media and longer dry-down periods. Regardless of vessel aesthetics, an uninhibited drainage hole at the base is non-negotiable. Select a pot that allows no more than 2 to 3 cm of clearance around the root ball; oversized containers simply hold a cold mass of wet substrate that roots cannot quickly colonize, inviting fungal decay.
| Substrate Component | Volume Ratio (%) | Particle Sizing | Horticultural Function |
|---|---|---|---|
| Coarse Horticultural Pumice | %35 | 3 - 6 mm | Maintains enduring macro-aeration pockets around roots; prevents substrate compaction. |
| Crushed Lava Rock (Scoria) | %20 | 2 - 5 mm | Supplies trace minerals and structural weight; absorbs excess water inside volcanic vesicles. |
| Clinoptilolite Zeolite | %15 | 2 - 4 mm | Buffers excess fertilizer salts, adsorbs ammonium, and maximizes cation exchange capacity. |
| Fibrous Coconut Coir (Coco Peat) | %20 | Fine fiber | Creates a pathogen-free, slowly degrading organic root cradle without collapsing into silt. |
| Coarse Perlite or Quartz Grit | %10 | 2 - 4 mm | Maximizes rapid drainage velocity and balances overall bulk density across the mix. |
5. Step-by-Step Propagation and Potting Techniques
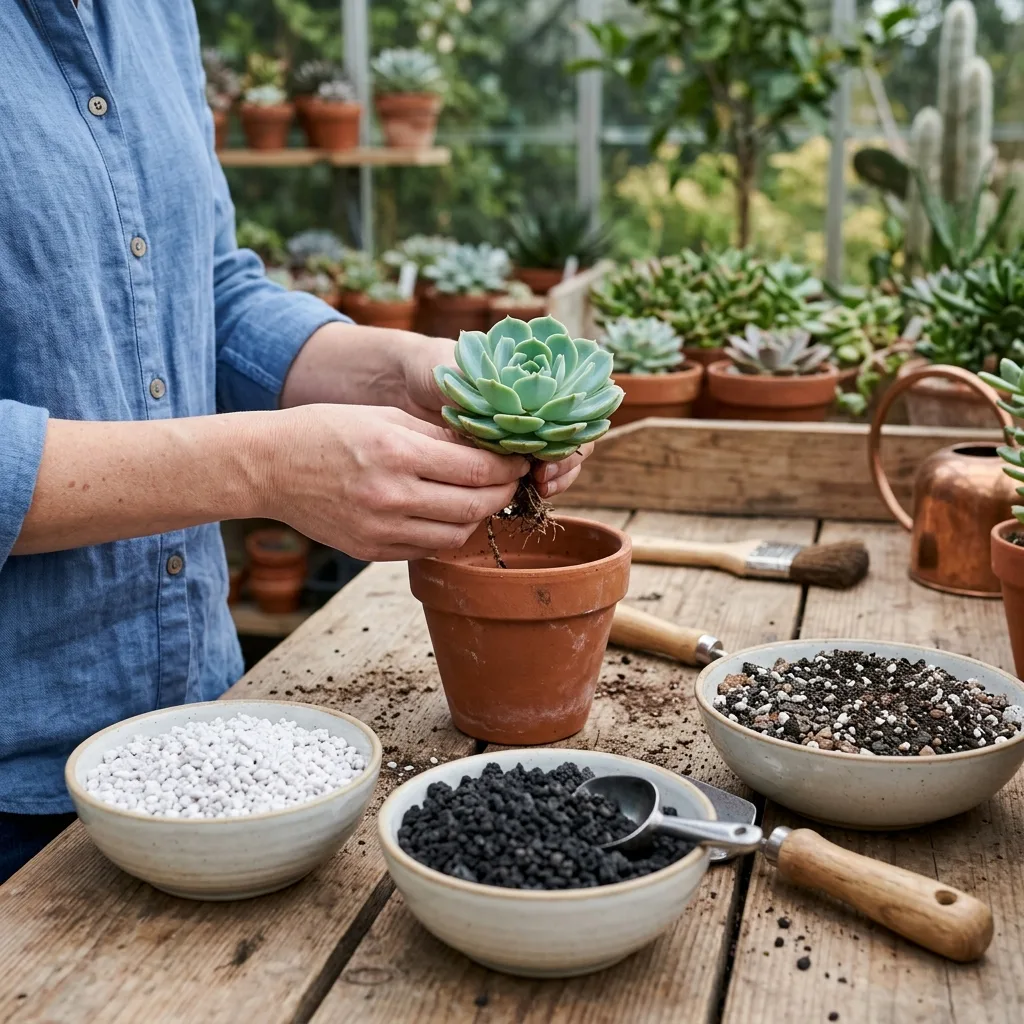
Succulent potting falls into two primary horticultural operations: transplanting an established, root-bound specimen, or rooting a bare vegetative stem cutting or detached rosette. Below is the precise protocol refined across our greenhouse benches:
- Gentle Extraction and Root Clearing: Squeeze flexible plastic nursery pots or run a sterile dull spatula around rigid containers to free the root perimeter. Meticulously tease away old, compacted, factory-grade peat moss from the root ball using your fingers or a blunt wooden chopstick. If residual peat remains wrapped around the root core, it forms a hydrophobic plug that prevents future moisture from ever reaching the root center.
- Sanitary Root Pruning and Aeration: Inspect the root network carefully. Excise desiccated, blackened, hollow, or circling girdling roots using alcohol-sterilized micro-snips. After pruning, let the bare-root plant rest on a clean tray in a shaded, ventilated space for 24 to 48 hours to form a firm wound callus over cut surfaces.
- Base Drainage Layer Configuration: Secure a small square of fiberglass mesh over the drainage hole to retain gritty substrate while facilitating rapid drainage. Add a thin 1 to 2 cm foundation layer of coarse pumice or lava rock to keep the drain pathways clear.
- Centering and Substrate Backfilling: Add your dry mineral blend until the pot is half full. Position the succulent so that its root collar—the precise junction where stem tissue transitions into root tissue—sits exactly 1 cm below the pot's rim. Spread the roots outward in their natural radial geometry, backfill with the remaining mineral mix, and firmly tap the container base against the potting table to settle aggregate into interstitial air pockets without crushing roots.
- Inorganic Top Dressing: Distribute a 5 mm layer of decorative pumice, crushed quartz, or zeolite over the exposed surface. Top dressing anchors lightweight perlite against splashing during irrigation, moderates surface soil temperatures, and ensures lower leaves never rest directly on damp substrate.
6. Common Pathogens, Pests, and Remediation
The earliest clinical sign of flawed potting protocol is basal leaf translucent yellowing. When leaves turn into squishy, water-filled vesicles that drop upon the slightest contact, systemic fungal rot has compromised the root flare. At this juncture, unpot the specimen immediately. Excise all necrotic, brown, or mushy tissue using a sterile scalpel until you expose crisp, pale-green, healthy vascular tissue. Dust the wound with elemental sulfur powder or horticultural cinnamon, allow it to dry unpotted in shade for 4 to 5 days, and replant in completely fresh mineral substrate.
Transplant stress also creates an opportunistic opening for mealybugs (Pseudococcidae), which favor root crevices and leaf axils. If you spot cotton-like white clusters among the root filaments while clearing old soil, dip an applicator in 70% isopropyl alcohol and dab the pests directly, or rinse the bare root network thoroughly in a dilute cold-pressed neem oil solution. Allow roots to dry fully before final potting. Incorporating zeolite into your substrate acts as a physical deterrent and moisture buffer, actively suppressing root-rot fungal proliferation.
7. Seasonal Calendar and Advanced Horticultural Tips
The optimal biological window for potting and repotting succulents coincides with their emergence from winter rest: Spring (March through May) and the early onset of autumn. During the extreme heat of midsummer (consistently above 35°C / 95°F), numerous genera—particularly winter-growers such as Aeonium, Dudleya, and certain Cotyledon—enter summer dormancy. Repotting during active dormancy significantly compromises root regeneration and increases rot susceptibility.
Avoid routine winter repotting whenever possible. If an emergency intervention is dictated by active stem rot or broken containers during cold months, house the patient under stable indoor temperatures (18–22°C / 64–72°F) under dedicated LED grow fixtures with adequate ambient air movement, doubling the dry intervals between watering. Once active vegetative growth resumes in spring, fortify emerging root tissue by administering a low-nitrogen, balanced succulent fertilizer at one-quarter strength every third watering.


Reader Reviews & Comments 3 Reviews
Eleanor Vance
Marcus Sterling
Clara Higgins
Leave a Review & Rating
Share your plant care tips, experiences, or questions with our succulent community.