






One of nature’s most miraculous artistic feats is coaxing an exquisitely sculpted, fleshy rosette out of a microscopic seed no larger than a speck of dust. While most plant enthusiasts step into the succulent realm through stem cuttings or leaf propagation, nurturing an Echeveria, Lithops, or Dudleya from a tiny seed is an entirely distinct botanical thrill. From the parched Karoo tablelands of South Africa to the sheer limestone canyons of Mexico, wild succulent seeds lie dormant in the dirt, waiting months for just a few drops of seasonal rain and the exact thermal trigger to initiate life. By recreating that fleeting desert spring right on your windowsill or propagation shelf, you can watch these microscopic specks transform into sparkling emerald droplets in just a matter of weeks.
Growing succulents from seed is never a race against time; it is a mindful meditation where you observe cellular differentiation, root anchoring, and natural survival strategies stage by stage. The setbacks hobbyists face rarely stem from unviable seeds—more often, they are caused by unsterilized substrates and fungal outbreaks brought on by stagnant, evaporative moisture. In this comprehensive guide, we unpack the precise greenhouse-tested sterilization protocols and practical horticultural techniques that lead your delicate seedlings safely from cotyledon emergence to mature, drought-hardy vigor.
1. Botanical Identity and Morphological Characteristics
Succulent seeds exhibit dramatic morphological diversity across different families. Genera within the Crassulaceae family (such as Echeveria, Crassula, and Sedum) yield dust-like, almost microscopic seeds resembling fine coffee grinds. In contrast, 'Living Stones' from the Aizoaceae family (Lithops, Conophytum) produce slightly larger, tear-drop shaped seeds with a resilient testa. Moving to the Agavaceae or Aloe lineages, seeds present as distinctively flattened, black, and often winged structures adapted for wind dispersal.
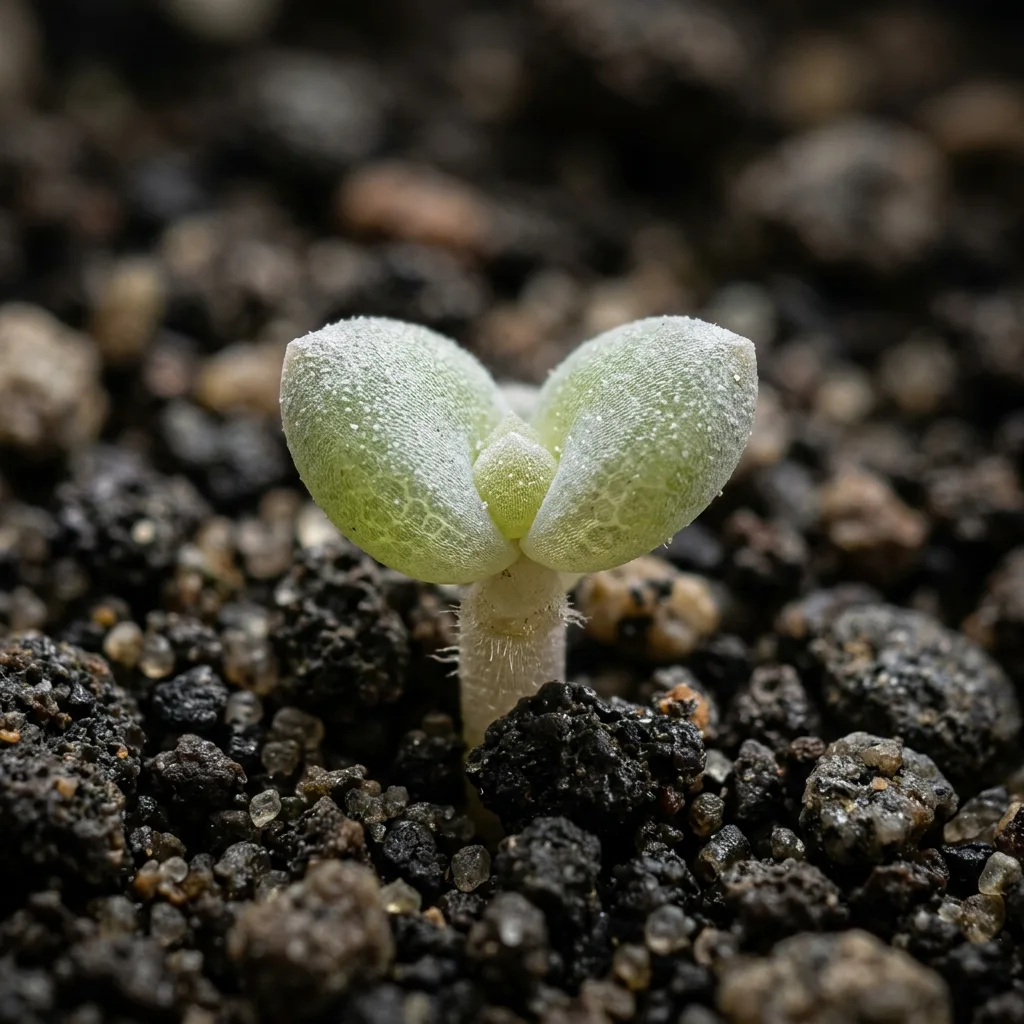
Upon imbibition and the trigger of cellular germination, the embryo pushes out its initial embryonic seed leaves, known as cotyledons. These ephemeral structures bear little resemblance to mature succulent foliage; they present as two delicate, non-succulent heart lobes focused solely on capturing early ambient light. Between 4 to 8 weeks later, the true primary leaves emerge from the central meristem. It is during this milestone that the seedling begins developing specialized water-storing parenchyma tissue within its mesophyll and starts synthesizing a protective epicuticular wax layer (known botanically as farina) across its epidermis to reflect harsh rays and reduce transpirational moisture loss.
2. Light Requirements and Indoor Positioning
While mature succulents bask enthusiastically in baking, unshielded sunshine, germinating seeds and tender young seedlings are far too fragile for direct solar radiation. The intense infrared radiation can create a lethal greenhouse effect within propagation domes, effectively parboiling tender cell walls. Germination demands abundant foot-candles (high lumen output) delivered exclusively as soft, diffused light.
In a home setting, an east-facing windowsill receiving gentle, veiled morning sun through a sheer curtain provides an excellent microclimate. However, for complete consistency, placing a 6500K cool-white, full-spectrum LED grow light 20 to 25 cm (8 to 10 inches) directly above the propagation tray set to a 14–16 hour daily photoperiod yields stellar, repeatable results. If your seedlings begin stretching upwards into fragile, pale stems (etiolation), they are pleading for brighter light. Conversely, if their tissue flushes deep reddish-purple, turns brown, and puckers prematurely, the light intensity is overly aggressive and must be dialed back.
3. Watering Discipline: Sub-Irrigation Protocol
The cardinal rule of mature succulent culture—allowing the potting mix to dry out bone-dry between thorough drenchings—will promptly kill germinating seeds. Delicate radical roots require an ambient relative humidity of 80–90% and continuously, evenly moist substrate surfaces for their first 4 to 6 weeks of life to establish an anchor. Crucially, you must never water newly sown seeds from above with a watering can or heavy mister; the kinetic force of falling water droplets will wash microscopic seeds deep into soil crevices where lack of light ensures they will rot.
Hydration must always be administered via sub-irrigation (bottom-watering). Place the perforated germination tray into an outer reservoir filled with lukewarm, clean water. Allow capillary action to draw moisture upwards through the porous mineral mix until the surface glistens, then lift the tray and allow all excess water to drain away thoroughly for 10 minutes. Once germination peaks and the first true leaves appear, the humidity dome should be ventilated incrementally, allowing the top millimeter of substrate to dry slightly between bottom soakings to stimulate the taproots to push downward in search of moisture.
4. Ideal Soil Substrate and Container Selection
A seed-starting substrate serves two critical, concurrent needs: it must provide a fine-grained, hospitable seedbed for delicate root hairs while maintaining porous, macro-aerated drainage that prevents stagnant water accumulation. Standard potting soils, garden loam, or coarse wood-bark mixes are entirely unsuitable. Your mix must rely on sifted, heat-sterilized peat or coco coir combined with porous micro-aggregates.
| Component | Ratio (%) | Horticultural Function & Botanical Benefit |
|---|---|---|
| Fine Sifted Sphagnum Peat or Coco Coir | 40% | Provides a sterile, water-retentive organic matrix that allows hair-thin roots to navigate easily. |
| Micro Pumice (1–2 mm) | 30% | Creates vital oxygen pockets around the root zone and prevents substrate compaction. |
| Fine Horticultural Zeolite (1–2 mm) | 15% | Enhances cation-exchange capacity (CEC), buffers nutrients, and suppresses fungal pathogens. |
| Washed Coarse Silica Sand (Sterile) | 15% | Optimizes uniform capillary action and provides micro-anchorage for emerging seedlings. |
Opt for shallow propagation trays or plastic nursery pots with a depth of 5 to 7 cm (2 to 3 inches) equipped with generous drainage holes and clear fitted domes. Before filling, moisten your blend lightly and sterilize it in an oven at 100°C (212°F) for 30 minutes (or in a microwave until steaming) to eliminate dormant fungal spores, gnats, and weed seeds before cooling to room temperature.
5. Step-by-Step Sowing Protocol and Propagation Routine
- Preparation and Sterilization: Thoroughly sterilize your customized substrate and allow it to return to ambient room temperature. Fill your clear-lidded nursery container with 4 to 5 cm of the damp mix and gently level the top layer without packing it down firmly.
- Sub-Irrigation Saturation: Rest the container in a shallow water bath filled with cooled, pre-boiled or distilled water. Allow capillary action to hydrate the mix entirely from bottom to top until the surface is damp. Remove and let excess water drain freely for 10 minutes.
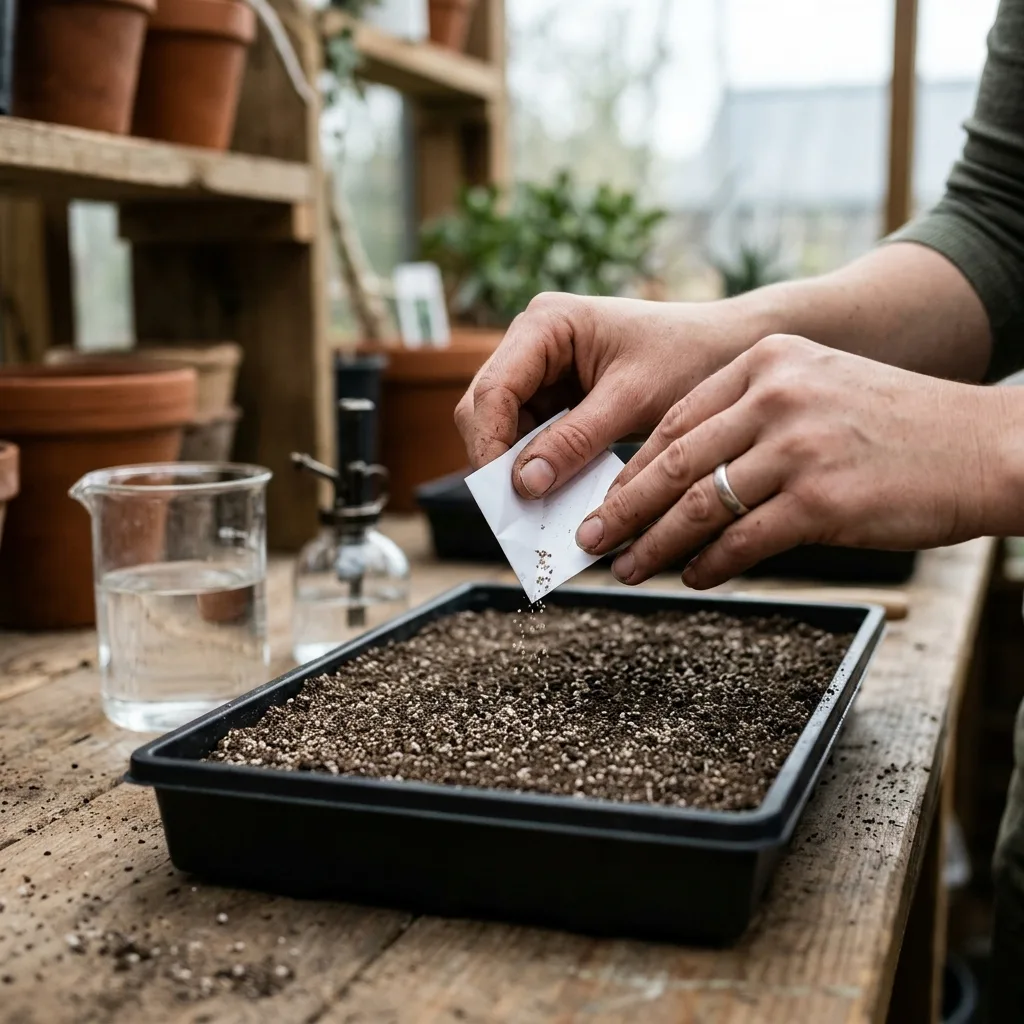
- Dispensing the Microscopic Seeds: Because succulent seeds are virtually dust-sized, crease a clean sheet of white paper down the middle and pour the seeds into the central groove. Gently tap the paper with your index finger to distribute the seeds thinly and evenly across the soil surface.
- Surface Contact: NEVER cover succulent seeds with a blanket of soil! The vast majority are photoblastic, requiring ambient light exposure to trigger enzymatic germination. At most, apply a microscopic dusting of sterile 1 mm quartz sand around them or press them down ever so lightly with a clean, dry fingertip to ensure solid substrate contact.
- Humidity Dome and Diurnal Temperature Swing: Seal the container with its clear lid or place the entire flat into a sealed transparent zip-lock bag to fashion an airtight micro-greenhouse. Maintain daytime temperatures between 22–26°C (72–79°F) and night temperatures dropping to 16–18°C (61–64°F). This natural day-night thermal swing mimics arid canyon climates and acts as a biological wake-up call for the seed embryo.
- Gradual Ventilation and Hardening: Once the first cluster of green pinheads appears (typically between 7 to 21 days), open the ventilation vents or prop the lid ajar for 15–20 minutes daily to encourage air exchange. Gradually increase airflow over the coming weeks; by month three, the cover can be removed permanently.
6. Common Pathogens, Pests, and Curative Protocols
The most catastrophic threat during early propagation is damping-off disease, an acute fungal condition caused by Pythium, Rhizoctonia, or Fusarium species. Seedlings that looked vigorous yesterday suddenly turn translucent and water-soaked at soil level, toppling over and liquifying in hours. Prevention is paramount: strictly sterilize substrates, implement brief daily lid ventilations, and dilute a splash of 3% hydrogen peroxide into early irrigation water (1 teaspoon per liter of water) to oxygenate the root zone and suppress fungal hyphae.
Another persistent adversary is the fungus gnat (Bradysia spp.). Attracted to moist, warm peat, adult gnats lay eggs in the substrate, and their translucent larvae ravenously graze on the root hairs and tender stems of new seedlings. Hang yellow sticky cards adjacent to the propagation area to capture adults, and top-dress the substrate with a fine 2 mm layer of sharp quartz sand to create a physical barrier that discourages oviposition.
7. Seasonal Seedling Calendar and Expert Tips
Spring (March – May): The undisputed golden window for sowing succulent seeds. Natural ambient photoperiods lengthen and moderate room temperatures keep seed trays in the sweet spot. Seeds germinate reliably within 2 to 3 weeks. Maintain bottom-watering and brief daily airings as true leaves form.
Summer (June – August): High indoor heat (above 32°C / 90°F) can trigger high-temperature dormancy, causing germination to stall completely. Shield seed trays from scorch, position them in the coolest well-lit space available, and rely strictly on sub-irrigation rather than overhead misting to avert fungal blooms.
Autumn (September – November): Seedlings are now 4 to 6 months old and resemble miniature replicas of mature specimens. This is the prime window for your first careful pricking-out session. Using blunt-tipped watchmaker tweezers, carefully lift crowded seedlings by their root ball—never by the fragile stem—and repot them into individual cells filled with standard gritty succulent mix.
Winter (December – February): A delicate season for young seedlings facing their inaugural winter. Unless supported by a full-spectrum grow light fixture and an adjustable seedling heat mat, winter seed starting is discouraged. Existing young seedlings should be maintained above 15°C (59°F) in bright light, with watering frequency scaled back to promote firm, compact growth.


Reader Reviews & Comments 3 Reviews
Eleanor Vance
Marcus Sterling
Chloe Bennett
Leave a Review & Rating
Share your plant care tips, experiences, or questions with our succulent community.