






From the sun-scorched Sonora Desert to the precipitous rocky outcrops of Oaxaca, cacti and fleshy succulents have spent millions of years evolving formidable hydraulic armor to defy prolonged drought and extreme solar radiation. Yet, when transported from these windswept, free-draining natural habitats into our living rooms, our green companions often fall victim to stagnant indoor air and excessive water delivered out of misguided love. If you inspect your windowsill container one morning and discover rust-colored crusts creeping across the stem, cottony white mildew, or soft, collapsing tissue, this resilient desert warrior is confronting an insidious fungal invasion.
The desperate query plant lovers frequently enter into search engines—'how to cure cactus fungus on succulents?'—is not an obituary; rather, it marks the beginning of a calculated, science-backed rescue operation. Fungi are opportunistic pathogens that exploit compromised cellular turgor pressure and breached epicuticular waxes. With precise, methodical interventions, you can rebuild cellular barriers, excise diseased tissue, and restore your succulent to vigorous health. Having witnessed this revival countless times across my nursery benches, I am sharing our exact step-by-step horticultural protocol with you.
1. Taxonomic Identity, Areole Morphology, and Spine Anatomy
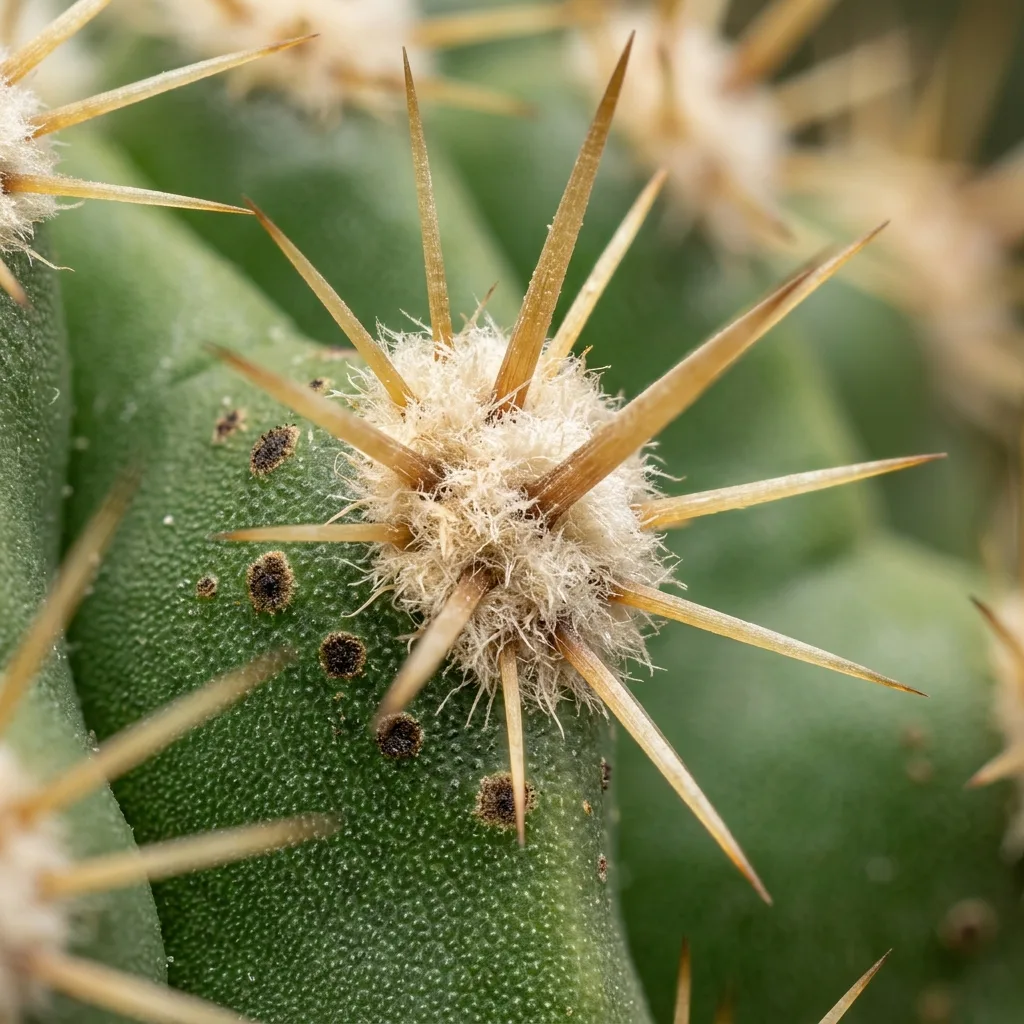
Before defending a cactus against fungal colonization, we must grasp its inherent structural defenses. The defining taxonomic organ separating the cactus family (Cactaceae) from all other succulent plant lineages is the 'areole'—a highly specialized, condensed vegetative bud. Areoles serve as the meristematic hubs from which spines, glochids, lateral offsets, and magnificent flowers emerge. A cactus's spines do not merely deter herbivores; they cast micro-shadows across the epidermis, break laminar wind flows to facilitate air circulation, and actively prevent moisture droplets from lingering on the dermis.
In other succulent groups such as Crassulaceae or Asphodelaceae, the stems and leaves are shielded by 'farina' (an epicuticular wax layer). This silvery, powdery bloom functions as the plant's natural sunscreen and hydrophobic barrier. Pathogenic fungal spores (notably species of Fusarium, Phytophthora, or Capnodium) typically breach these defenses through micro-fissures caused by cellular edema, bruised areole tissues, or abrasions in the protective farina. The appearance of grey, brown, or rusty lesions signals that fungal hyphae have begun metabolizing the water-storing parenchyma cells within.
2. Lighting, Irradiance Levels, and Ventilation Standards
The sworn enemies of fungal proliferation are an abundant photon flux and continuous fresh air exchange. Many growers make the fatal mistake of shifting a sick cactus into a dim, shaded room to 'let it rest'; this drastically accelerates spore germination and fungal mycelium expansion. Cacti rely on Crassulacean Acid Metabolism (CAM) photosynthesis, holding their stomata tightly closed during the day to prevent transpiration and opening them at night to take up carbon dioxide. Daytime illumination provides the energy currency required for active cellular repair and chemical immune synthesis.
Throughout fungal treatment, your plant requires at least 6 to 8 hours of bright, filtered sunlight daily through a sheer curtain. Avoid scorching noon sunlight during the first week, as sunscald can quickly compromise tissue already weakened by pathogens; gentle morning and late-afternoon sun are ideal. Air movement is equally vital: stagnant ambient air elevates the relative humidity around the pot surface, transforming it into a high-humidity incubator for spores. Ventilate the room at least twice daily or direct a gentle, indirect fan across the collection to ensure the plant epidermis remains bone dry.
3. Hydration Cycles and the Vital Winter Dormancy Regime
Frequent watering is never an expression of plant affection; it suffocates the subterranean root network by displacing vital oxygen. Over ninety percent of succulent fungal fatalities originate at the root collar, where saturated soil leads to anoxic conditions and rots the primary xylem vessels. The instant you confirm a fungal outbreak, your fundamental rule is: Halt all watering immediately. Do not apply a single drop of water until the substrate has desiccated entirely from the top layer down to the drainage holes.
During their natural dormancy period—spanning late autumn through early spring—a cactus's metabolic activity slows to a near standstill. During this phase, ambient temperatures should ideally hover around 8–12°C (46–54°F), and watering should be reduced to once a month, or even once every 6 to 8 weeks depending on the species. Hydrating a cactus kept in a warm, low-light room during winter induces weak, etiolated growth whose paper-thin cell walls are effortless prey for grey mold (Botrytis cinerea). A dormant, unwatered cactus may wrinkle slightly; do not panic. This shriveling concentrates intracellular solutes and sugars, conferring potent natural resistance against both freezing temperatures and fungal attacks.
4. High-Mineral Substrate Formulations and Container Dynamics
The definitive secret to eradicating fungal rot permanently lies in breaking your soil's water-retention capacity. Peat-heavy potting soils and garden loam hold onto moisture for days like dense sponges, forming an ideal breeding ground for pathogenic colonies. Cacti and succulent root systems demand a granular, open-structured mineral substrate where excess water drains away within seconds.
Container selection is just as critical. Always choose unglazed terracotta pots equipped with generous drainage holes. Thanks to its porous, breathable clay walls, terracotta permits excess moisture to evaporate laterally through the pot itself, delivering ample oxygen to the root zone. Plastic, glazed ceramic, or glass vessels seal moisture inside, inviting opportunistic pathogens.
| Substrate Component | Ratio (%) | Botanical Function & Anti-Fungal Mechanism |
|---|---|---|
| Horticultural Pumice | 40% | Cellular micro-pores channel oxygen directly to root xylem; ensures aeration without water retention. |
| Crushed Lava Rock (Scoria) | 20% | Provides ballast and maintains drainage conduits; eliminates standing water at the root collar. |
| Clinoptilolite Zeolite | 15% | Binds excess ammonium and salts; possesses natural antimicrobial properties that suppress pathogen growth. |
| Coarse River Sand / Quartz Grit | 10% | Anchors fine root hairs and facilitates rapid gravity-assisted drainage through the base. |
| Sterilized Coco Coir Fibers | 15% | Offers a minimal, fibrous organic anchor; far more resistant to molding than standard peat moss. |

5. Immunity Enhancement and Strategic Nutrient Protocols
A robust plant immune system is your first line of defense against fungal incursions. Succulents overfed with high-nitrogen fertilizers experience rapid, bloated cellular expansion, resulting in thin, weak cell walls that fungal appressoria can penetrate with ease. Supplemental feeding during spring and summer must prioritize a Low Nitrogen - High Potassium and Phosphorus nutritional profile (such as NPK 5-10-15 or 4-8-12).
Potassium strengthens cell membranes and reinforces the hydraulic efficiency of guard cells around stomata. To induce prolific blooming and fortify natural defenses, guide your specimen through a crisp, dry winter dormancy. When active spring growth resumes, apply a balanced cactus fertilizer enriched with chelated trace minerals (iron, magnesium, and bioavailable silicon). Silicon accumulates directly within the epidermal cells, creating a tough, physical biomineral armor that halts fungal penetration.
6. Surgical Propagation, Cuttings, and Rescue Grafting
When fungal rot penetrates deeply into the vascular ring of the main stem, the only path to survival is surgical excision—taking a salvage cutting. Execute this procedure with clinical precision:
- Tool Sterilization: Thoroughly sterilize a fresh scalpel or utility razor using 70% isopropyl alcohol or open flame.
- Clean Transverse Cut: Slice cleanly across the stem at least 1 to 2 cm (0.5 to 0.8 inches) above the visibly softened or discolored zone. Inspect the internal vascular ring: the exposed flesh must be immaculate white and green. If you see even a single brown or orange speck, sterilize your blade again and slice higher.
- Callus Formation: Dust the clean wound surface liberally with powdered sulfur or pure cinnamon powder as a natural antiseptic. Do not place the cutting into soil immediately! Set it aside in a warm, dry, shaded, and well-ventilated space for 7 to 14 days until a firm, dry, leathery callus develops over the entire cut.
- Dry Rooting: Place the callused cutting upright onto a dry bed of pure pumice and zeolite grit. Withhold watering entirely until root primordia begin to emerge; mist the surrounding mineral surface lightly once a week to encourage root search without inducing decay.
If dealing with an exceptionally rare or slow-growing species with minimal healthy tissue remaining, you can perform emergency top-grafting onto a vigorous, disease-resistant rootstock such as Hylocereus undatus or an Echinopsis hybrid.
7. Integrated Defense Against Rot and Fungal Pathogens
Eradicating cactus fungus requires an integrated three-pronged methodology: physical eradication, chemical/biological suppression, and environmental correction.
1. Differential Diagnosis: Orange, scab-like crusts indicate 'Cactus Rust'; a chalky white film signals 'Powdery Mildew'; a wet, blackened, structural collapse rising from the base indicates lethal 'Root and Stem Collar Rot' (Phytophthora or Pythium).
2. Immediate Quarantine: Move the afflicted specimen at least 2 meters (6 feet) away from the rest of your collection immediately. Fungal conidia travel effortlessly on room air currents or splashes of water.
3. Targeted Fungicide Application: For surface-level outbreaks (rust and mildew), apply a systemic horticultural fungicide containing copper oxychloride, tebuconazole, or azoxystrobin mixed precisely according to package instructions. As a bio-friendly alternative, pure micronized sulfur dust can be applied directly to active lesions using a soft paintbrush. Dilute potassium bicarbonate solutions or cold-pressed neem oil can mitigate early-stage surface mildews, but always apply them during twilight hours at low concentrations to protect the plant's delicate farina wax.
4. Root Zone Sanitation: If the root ball is compromised, gently unpot the specimen and wash all residual soil away using lukewarm running water. Trim away any hollow, mushy, or blackened roots with sterilized scissors. Submerge the remaining root structure in a 3% hydrogen peroxide solution (diluted 1 part peroxide to 4 parts water) for 10 minutes to eradicate anaerobic bacteria and fungal hyphae. Allow the root system to dry in the air for 24 hours, then repot into fresh, fully sterilized mineral substrate.


Reader Reviews & Comments 3 Reviews
Julian Vance
Clara Sterling
Marcus Bennett
Leave a Review & Rating
Share your plant care tips, experiences, or questions with our succulent community.