






Glancing at a piece of fresh ginger forgotten on your kitchen counter one morning, you may have spotted tiny, greenish swollen nubs desperately reaching for life. Native to the humid, organic-rich forest floors of Southeast Asia, Zingiber officinale possesses a succulent-like resilience courtesy of its fleshy, modified underground stems—its rhizomes—which store copious amounts of water and nutrients. So, the question arises: 'Can I truly plant ginger bought from the local supermarket or grocery store?' Our answer is a resounding yes; however, reawakening this miraculous botanical reservoir in a container demands an understanding of a few foundational botanical principles.
Many assume commercial supermarket ginger is sterile or chemically rendered incapable of sprouting. In truth, with an adequate rehydration bath to leach out shelf-life inhibitors, paired with an open, free-draining substrate, that humble kitchen root can unfurl into an elegant, bamboo-like display of tropical foliage right in your living room. Let us walk through the exact botanical path from a grocery counter rhizome to your own homegrown organic harvest.
1. Botanical Identity and Morphological Characteristics
Ginger (Zingiber officinale) is a herbaceous perennial monocot belonging to the family Zingiberaceae. What is colloquially called the 'root' is, from a strict botanical standpoint, a fleshy rhizome (a horizontal subterranean stem). These swollen rhizomes serve as vital survival reservoirs, loaded with water, starches, and pungent volatile oleoresins (chiefly gingerol and shogaol) designed to carry the plant through seasonal dry spells. Rather than storing water in thick leaves like xerophytic succulents, ginger relies on this underground modified stem structure to navigate environmental adversity.
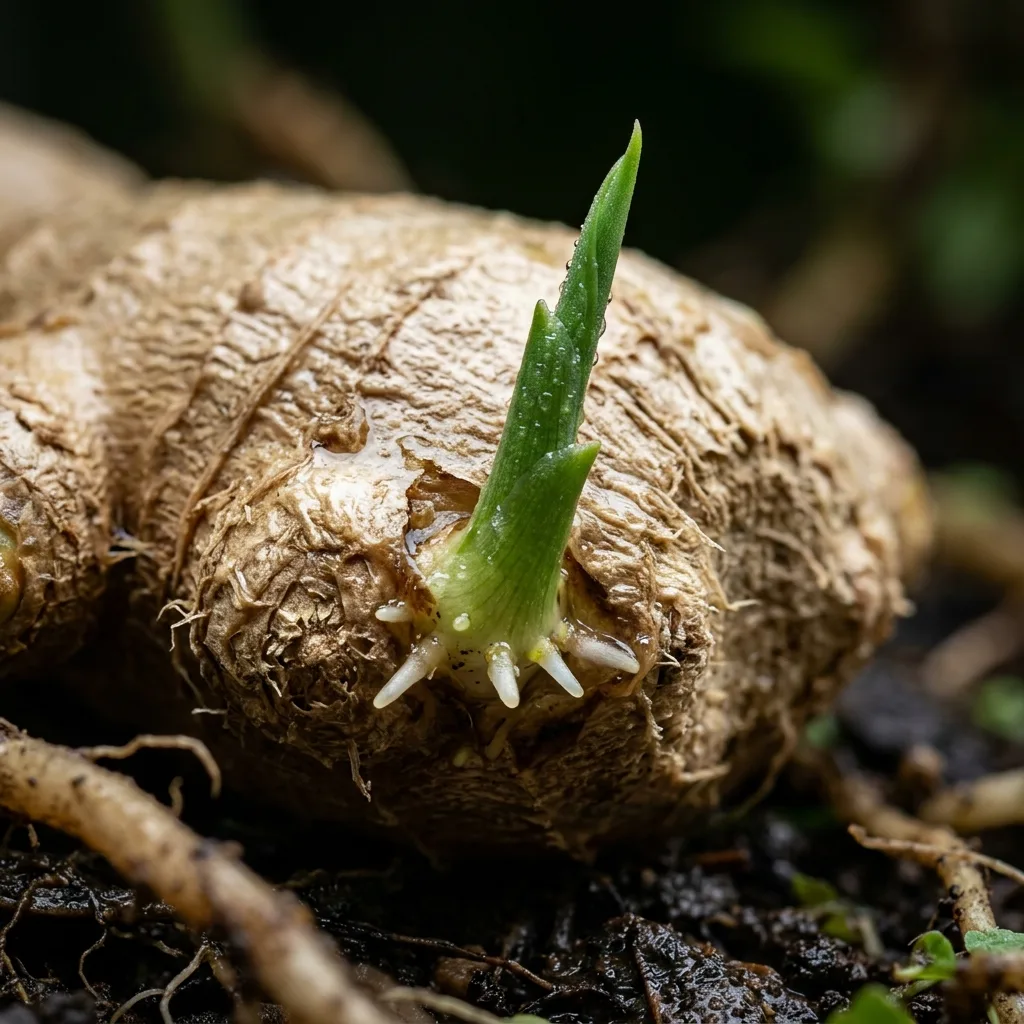
The distinct raised nodes visible across the rhizome surface are apical meristematic buds, frequently termed 'growth eyes'. When exposed to sufficient ambient warmth and relative humidity, these buds activate, initiating cellular division. They first send downward white, fleshy contractile roots before thrusting lanceolate, glossy green pseudostems skyward. Given optimal care indoors, ginger readily reaches 90–120 cm in height, presenting an architectural, reed-like canopy reminiscent of miniature bamboo.
2. Light Requirements and Indoor Positioning
Having evolved in the filtered understory of tropical rainforest canopies, ginger does not appreciate the punishing, unmediated midday sun endured by desert cacti. Instead, its photosynthetic machinery thrives where it receives 2 to 3 hours of soft early morning or late afternoon sun, complemented by intense, dappled, bright indirect light throughout the rest of the day.
Locations directly flanking northeast or east-facing windows, or settled behind sheer drapery near a south-facing exposure, represent prime microclimates. Under insufficient light, the pseudostems stretch and weaken, displaying pronounced internodal etiolation. Conversely, excessive direct ultraviolet radiation precipitates marginal necrosis and photo-oxidative chlorophyll breakdown. To spark vigorous root initiation, maintain ambient temperatures between 21°C and 28°C (70°F–82°F); temperature drops below 13°C (55°F) prompt the rhizome into sudden dormancy or catastrophic fungal decay.
3. Watering Discipline: The 'Soak and Partial-Dry' Protocol
Because rhizomes are already packed with cellular water reserves, overwatering represents the single most prevalent cause of failure in ginger cultivation. Depriving root parenchyma tissues of dissolved oxygen invites rapid colonization by anaerobic pathogens, turning firm tissue into foul-smelling mush within days.
Irrigation should mirror the gold standard of fleshy-stemmed horticulture: drench thoroughly, then allow the upper substrate profile to dry out. Irrigate until water drains freely from every drainage port, and never allow the catch tray to hold standing water beyond 15 minutes. Check the top 3–4 cm of soil with your finger; only when this zone feels devoid of residual moisture should you water again. During initial sprouting, keep the mix delicately humid without ever allowing it to become waterlogged.
4. Ideal Soil Substrate and Container Selection
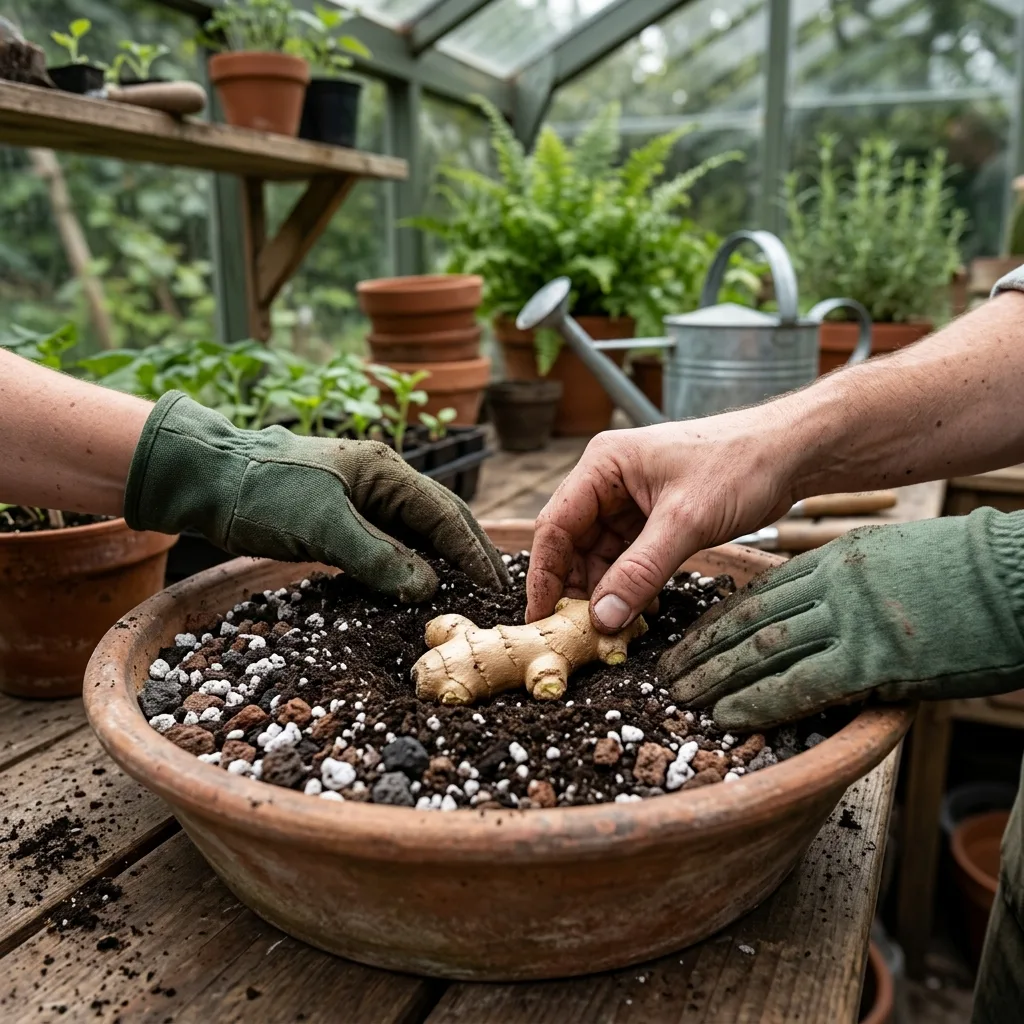
Ginger rhizomes expand horizontally across the topsoil horizon rather than diving deep. Consequently, prioritize wide, trough-style planters measuring at least 30–40 cm across and 20–25 cm deep over tall, narrow pots. Unglazed terracotta containers, with their microporous clay walls, are vastly superior to plastic for gas exchange and moisture regulation.
The potting medium must strike a balance between rapid drainage, optimal oxygen diffusion to the vascular xylem, and sufficient organic matter to sustain vigorous vegetative growth:
| Component | Proportion (%) | Agronomic & Botanical Function |
|---|---|---|
| Quality Potting Soil / Peat Base | 40% | Core nutrient retention and fundamental moisture matrix |
| Pumice Stone (3–5 mm) | 25% | Permanent structural aeration and root zone gas exchange |
| Aged Worm Castings / Compost | 20% | Microbial diversity and slow-release organic humic nutrition |
| Lava Rock / Zeolite | 10% | Cation-exchange capacity, mineral reserves, and anti-compaction |
| Coarse Perlite | 5% | Lightweight structure and capillary moisture distribution |
5. Step-by-Step Sprouting and Planting Protocol
Cultivating ginger from a kitchen root is an extraordinarily rewarding botanical project. Follow this calibrated protocol to transition a market rhizome into a thriving specimen:
- Select Quality Rhizomes: Look for firm, plump specimens at the store with smooth, unwrinkled skin and visible, raised, greenish-buff buds (growth eyes). Avoid rubbery or blackened pieces.
- The Rehydration Soak: Immerse the rhizome in non-chlorinated, room-temperature water for a full 24 hours to leach inhibitors and rehydrate meristem tissue.
- Sectioning (Optional): If working with a large rhizome cluster, sever it into 4–5 cm segments using a sterile blade, ensuring each piece retains at least 2–3 viable eyes. Allow the cut surfaces to callous in a shaded, ventilated room for 24–48 hours to create a protective suberin barrier against pathogen entry.
- Pre-Sprouting Incubation: Wrap the rhizome pieces in a lightly damp paper towel sealed within an aerated plastic bag, or nestle them into shallow, moist perlite at 24–26°C (75–78°F). Within 1 to 3 weeks, the eyes will swell and push out vivid green tips.
- Horizontal Potting: Layer drainage material at the pot base, add your pre-mixed substrate, and position the rhizome horizontally with the pointed green eyes directed upward. Cover with only 2–3 cm of loose soil. Burying rhizomes excessively deep is an open invitation to rot.
- Establishment Watering: Moisten the medium gently and set the pot in a warm, brightly lit location. Emerald pseudostems will pierce the soil surface within 2 to 3 weeks.
6. Common Pathologies, Pest Vectors, and Remediation
Nearly 90% of failures encountered when growing ginger indoors stem from abiotic stressors. Below are primary diagnostic symptoms and corrective horticultural interventions:
- Soft Rhizomes and Sour Odor (Rhizome Rot - Pythium / Fusarium): Direct consequences of cold, saturated, oxygen-depleted soil. Unpot immediately, excise soft tissue using a sterile scalpel, bathe the firm remaining rhizome in a diluted 3% hydrogen peroxide solution, and repot into fresh, highly porous, pumice-rich substrate.
- Crispy, Brown Foliar Margins: Symptoms of dry indoor air (low relative humidity) or tap water salinity (fluoride/chlorine buildup). Introduce a wide pebble tray filled with water beneath the pot and irrigate exclusively with filtered or aged water.
- Two-Spotted Spider Mites (Tetranychidae): Often provoked by warm, arid indoor winter air, appearing as fine stippling and webbing beneath leaves. Clean foliage under a tepid shower stream and treat with an emulsion of cold-pressed horticultural neem oil.
7. Seasonal Growth Cycle and Harvesting
Ginger rewards steady patience. The ideal window for initiating growth is early spring (March to April). Throughout the warmth of summer, the plant exhibits rapid vegetative vigor; support this phase with a dilute organic liquid fertilizer every 3 weeks.
Come late autumn (October to November), shorter photoperiods cause foliage to yellow and senesce. This natural decline is not disease; the plant is mobilizing aerial carbohydrates downward into rhizome reserves. Cease irrigation completely and allow the stalks to desiccate. Once fully withered, invert the pot to unearth the rhizome cluster. Savor your tender, low-fiber, pink-tipped baby ginger fresh, while reserving the most robust section with prominent eyes in a cool, dry spot for replanting the following spring.


Reader Reviews & Comments 3 Reviews
Clara Higgins
Marcus Thorne
Eleanor Vance
Leave a Review & Rating
Share your plant care tips, experiences, or questions with our succulent community.