






Whispering with the sea breeze across the ancient limestone slopes of the Mediterranean basin for millennia, the olive tree (Olea europaea) is, by virtue of its xerophytic nature and water-storing woody vascular tissues, the most venerable kin to succulent enthusiasts. With its shimmering silvery-green foliage, drought-defying cellular architecture, and generous drupes, this storied tree has recently brought a sophisticated Mediterranean aura into the living rooms, balconies, and courtyards of succulent and bonsai collectors. In our greenhouse at Sukulentler.com, where we raise olive trees side by side with desert cacti and rare caudiciforms, they thrive precisely under that familiar regimen: radically porous substrates and disciplined, controlled irrigation.
Yet, when your container-grown specimen or garden tree yields its very first harvest, how do you transform those astringent, intensely bitter fruits into luscious, cured table delicacies? The question of how to cure and brine home-grown olives stands at the sublime crossroads of botanical cultivation and traditional culinary preservation. In this journey bridging ripening biochemistry on the branch to lactic acid fermentation within glass jars, you will safeguard your plant’s vigor while crowning your harvest with a flawless homemade brine.
1. Botanical Identity and Morphological Adaptations
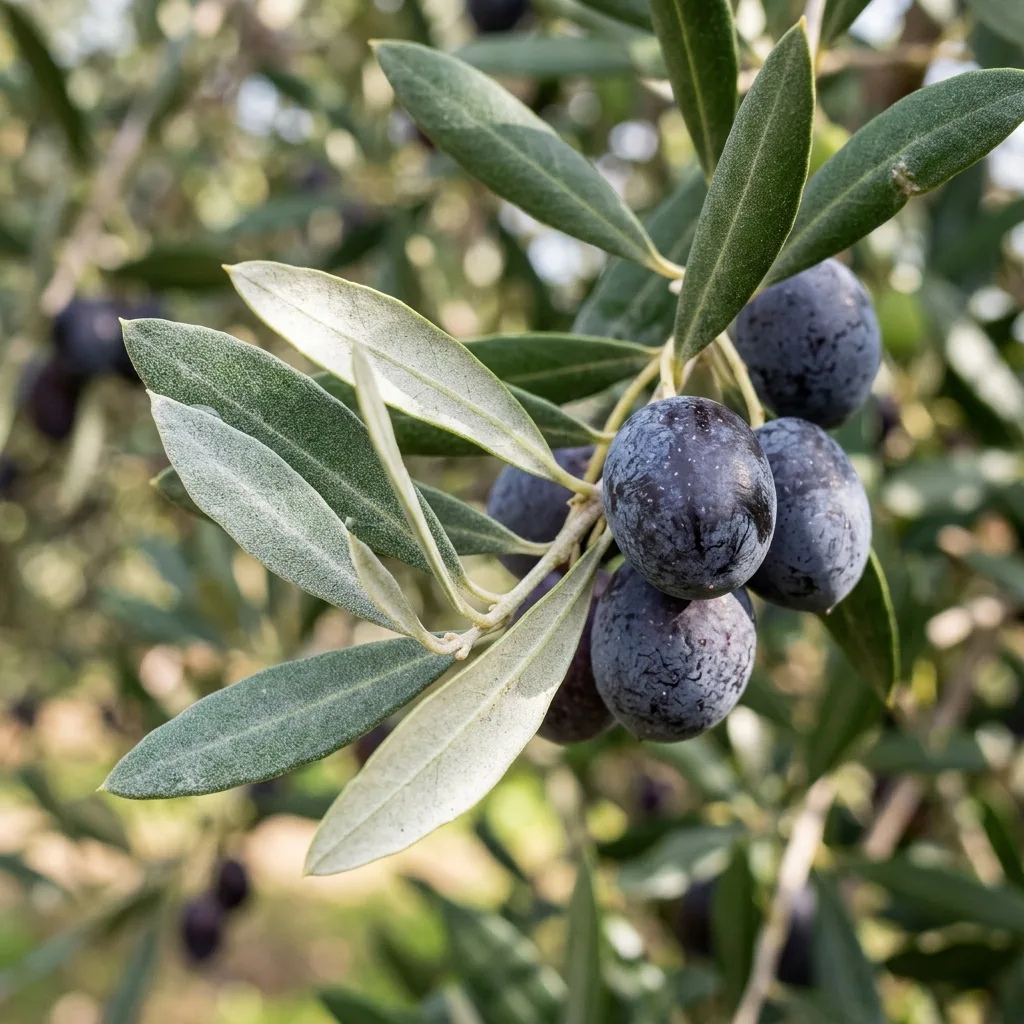
The olive tree (Olea europaea, belonging to the family Oleaceae) is a sclerophyllous (hard-leaved) evergreen woody species. It exhibits specialized morphological adaptations that any seasoned succulent grower will instantly appreciate. The abaxial (lower) surface of its foliage is carpeted with microscopic, peltate trichomes (protective hairs) paired with a silvery, farina-like waxy cuticle layer; these structures reflect excessive ultraviolet radiation and curb transpiration to negligible levels. At the tissue level, dense mesophyll cells hoard structural moisture, while the deep xylem network generates extraordinary negative osmotic pressure, extracting residual moisture from the soil matrix even during extended arid spells.
As the trunk matures, it develops sculptural, fluted twists and ridges; this caudex-like secondary woody thickening serves as a vital carbohydrate and hydration reservoir against severe environmental stress. Botanically, the fruit is a drupe (a fleshy stone fruit). As it shifts pigments from vibrant green to deep purple and jet black, it synthesizes high concentrations of oleuropein, an intensely bitter secoiridoid glycoside. The fundamental botanical purpose of water-curing and brining is to systematically leach and enzymatically hydrolyze this defensive oleuropein compound through natural fermentation and osmotic saline exchange.
2. Photoperiodic Demands and Indoor Placement
Much like full-sun devotees such as Agave and Echeveria, Olea europaea demands high levels of Photosynthetically Active Radiation (PAR). Providing a minimum of 6 to 8 hours of unfiltered, direct sunlight per day is imperative to prevent internodal stretching (etiolation) and to stimulate reproductive floral bud differentiation. If maintained indoors, place your container directly against an unobstructed south- or southwest-facing window. Under insufficient light intensity, chronic leaf abscission is practically inevitable.
Dynamic airflow is equally paramount. Stagnant, humid indoor environments provide fertile ground for opportunistic fungal spores and scale insect infestations beneath the leaf undersides. Transitioning your container outdoors to an open, breezy balcony or sun-drenched patio from late spring through early autumn will noticeably enhance epidermal cellular turgor, branch ramification, and fruit set.
3. Irrigation Discipline: The 'Soak and Dry' Principle
While mature field specimens exhibit monumental drought resilience, container-grown potted olives adhere strictly to the classic succulent rule: 'soak and dry thoroughly'. You must allow the potting medium to dry out at least halfway down the pot—verified with a tactile wooden skewer or an accurate moisture meter—before introducing water again. If root systems remain persistently waterlogged, delicate root hairs experience hypoxia, collapsing into necrotic root rot predominantly orchestrated by Phytophthora pathogens.
When irrigating, saturate the root ball thoroughly until water runs freely from the drainage apertures, and immediately discard any runoff pooled in the drainage saucer. In winter, as ambient temperatures drop and vegetative metabolism slows into dormancy, irrigation intervals must be extended considerably. Chronic overwatering typically manifests first as generalized chlorosis (leaf yellowing), followed by limp, unblemished leaves dropping spontaneously from the stems.
4. Ideal Substrate Formulation and Container Selection
Olive root architecture thrives in moderately alkaline, gritty, and exceptionally aerated substrate mixtures. Dense, peat-heavy, water-retentive store-bought potting soils suffocate their fine feeder roots. You should blend a gritty substrate with a high percentage of inorganic porous aggregates, closely mirroring a premium succulent soil. For pottery, always favor unglazed, breathable terracotta; its porous clay walls allow trapped moisture to evaporate evenly from the periphery of the root zone.
| Soil Component | Volumetric Ratio (%) | Botanical & Agronomic Function |
|---|---|---|
| Horticultural Pumice (3-6 mm) | 35% | Superior drainage, macroporous root aeration, and compaction prevention |
| Crushed Lava Rock / Zeolite | 25% | Anchorage, structural mineral release, and cation exchange buffering |
| Native Loamy Garden Soil | 25% | Beneficial microflora and balanced baseline nutrient retention |
| Aged Worm Castings / Leaf Compost | 15% | Slow-release organic sustenance and protective humic compounds |

5. Step-by-Step Propagation and Fruit Harvesting
Cultivar propagation is reliably achieved via semi-hardwood stem cuttings. In midsummer, harvest healthy, semi-lignified terminal shoots measuring 15-20 cm from the current season’s growth. Strip away the basal leaves, treat the fresh cut with rooting hormone (IBA), and insert the cutting into a sterile medium composed of 70% horticultural pumice and 30% coarse perlite. Under warm ambient temperatures and high relative humidity, adventurous root formation typically initiates within 6 to 8 weeks.
Come autumn (typically October through November), when the glossy skin transitions from vibrant lime to a blushed purplish-green, your olives are primed for harvest. Hand-pick each drupe with a gentle twisting motion to avoid bruising the delicate pericarp. Raw olives straight from the branch are completely inedible due to the intense bitterness of concentrated oleuropein; this is where traditional curing craftsmanship steps in.
6. Step-by-Step Natural Olive Curing and Brining Protocol
The safest, most flavor-rich method to transform homegrown olives into table delicacies without commercial lye (sodium hydroxide) is through slow water leaching followed by an osmotic lactic brine. Two time-tested artisanal variations exist: Slit/Cracked Green Olives and Dry-Salt Cured (Sele) Olives.
Traditional Slit Green Olive Brining Protocol:
- Sorting and Sanitization: Rinse firm, undamaged green olives under cool running water. Discard any drupes with insect punctures, softness, or fungal blemishes.
- Slitting / Cracking: Using a sharp, sterile stainless-steel pairing knife on a clean board, make 2 to 3 lengthwise incisions into the flesh down to the stone (or crush them lightly with a flat wooden mallet). This breach accelerates the outward diffusion of bitter oleuropein into the water bath.
- Water Leaching (Debittering Phase): Transfer the prepared olives into food-grade glass jars and submerge them fully in clean, unchlorinated water. Seal tightly. Drain and replenish the water daily for 10 to 14 consecutive days. Near the end of this cycle, sample a rinsed fruit to evaluate whether the sharp astringency has subsided to a pleasant, nutty bitterness.
- Master Brine Formulation: Prepare your curing brine. In 1 liter of boiled and thoroughly cooled non-chlorinated water, dissolve 80 to 100 grams of pure, non-iodized coarse rock salt or sea salt (iodized table salt degrades pectin cell walls, turning olives mushy!) alongside 1 teaspoon of citric acid (or the strained juice of half a lemon).
- Jarring and Anaerobic Sealing: Pack the debittered olives into clean glass jars, pouring the brine until every single fruit is completely submerged. Crown the top with a 1-centimeter layer of extra virgin olive oil to form a protective lipid seal against airborne wild fungi. Store in a cool, dark pantry for 2 to 3 weeks before serving.
7. Common Pests, Pathologies, and Botanical Treatments
In indoor and sheltered patio cultivation, the most prevalent arthropod pests are scale insects (Coccoidea) and mealybugs, which congregate primarily in leaf axils and beneath foliage. Much like succulent pest protocols, address white cottony clusters or brownish protective scales promptly by wiping stems and leaf undersides with a soft cloth soaked in diluted cold-pressed neem oil or potassium-based insecticidal soap.
The appearance of concentric dark circular lesions with yellowish halos on the upper leaf surface signifies Olive Leaf Spot, also known as Peacock Spot (Spilocaea oleagina). This fungal malady erupts under excessive ambient humidity and poor ventilation. Prune out all affected leaves immediately, prolong dry intervals between waterings, and position the tree where air circulates freely.
8. Seasonal Care Calendar & Horticultural Milestones
- Spring (March – May): Break of winter quiescence. The prime window for root pruning, container repotting, and structural canopy shaping. Initiate feeding with a low-nitrogen, potassium- and phosphorus-forward organic liquid fertilizer.
- Summer (June – August): Vigorous vegetative flush and fruit swell. Maintain under full, direct solar exposure. Apply thorough waterings only when the substrate matrix dries completely, never allowing standing water at the root flare.
- Autumn (September – November): Fruit harvesting and brining window. Taper irrigation frequency substantially and cease all fertilizer inputs to prepare the cambium for cold dormancy.
- Winter (December – February): Cold vernalization phase. To initiate reproductive floral buds for the succeeding year, Olea europaea requires a cumulative chilling period between 2°C and 10°C (35°F–50°F) for roughly 6 to 8 weeks. Keep potted trees away from artificial heating vents and high room temperatures during this vital resting state.


Reader Reviews & Comments 3 Reviews
Marcus Sterling
Eleanor Vance
Julianna Reed
Leave a Review & Rating
Share your plant care tips, experiences, or questions with our succulent community.