






From the sun-drenched limestone escarpments of the Mediterranean basin to the semi-arid steppes of Central Asia, irises (Iris spp.) have long been celebrated in classical mythology as the earthly manifestation of the rainbow goddess. Yet, when you relocate these architectural perennials from expansive garden borders into the confines of a patio container or planter, you must artificially reconstruct the delicate environmental equilibrium that nature orchestrates so effortlessly. Iris rhizomes feature semi-succulent, specialized water-storing parenchyma tissue, rendering them exceptionally vulnerable to root hypoxia; in an anoxic, heavy, or saturated substrate, cellular collapse and bacterial decay can decimate a specimen within days.
Container culture is by no means an inferior compromise—it is, in fact, an extraordinary opportunity to master the microclimate and curate optimal physical soil dynamics. Within the finite boundaries of a pot, gravitational water movement operates under different hydraulic mechanics than in open soil beds, frequently creating a saturated, oxygen-depleted zone at the base known as a 'perched water table'. Consequently, cultivating long-lived, floriferous container irises depends entirely on coarse structural aggregates, porous mineral constituents, and an intentional shallow planting geometry that permits the rhizome's dorsal crest to bask directly in natural solar radiation.
The single most destructive blunder made by plant enthusiasts is treating an iris like a typical tropical houseplant—burying it deep in dense, peat-dominated potting soil. Just as overwatering succulents is not an act of nurturing but an inadvertent asphyxiation of feeder roots, the exact same botanical principle applies to iris rhizomes. In this master horticultural guide, we dissect every variable of container iris cultivation—from pot wall thermodynamics and mineral sieve calibration to rhizome division geometry and the indispensable post-transplant 'dry-rest' rule.
1. Comparative Analysis of Inorganic Mineral Substrates
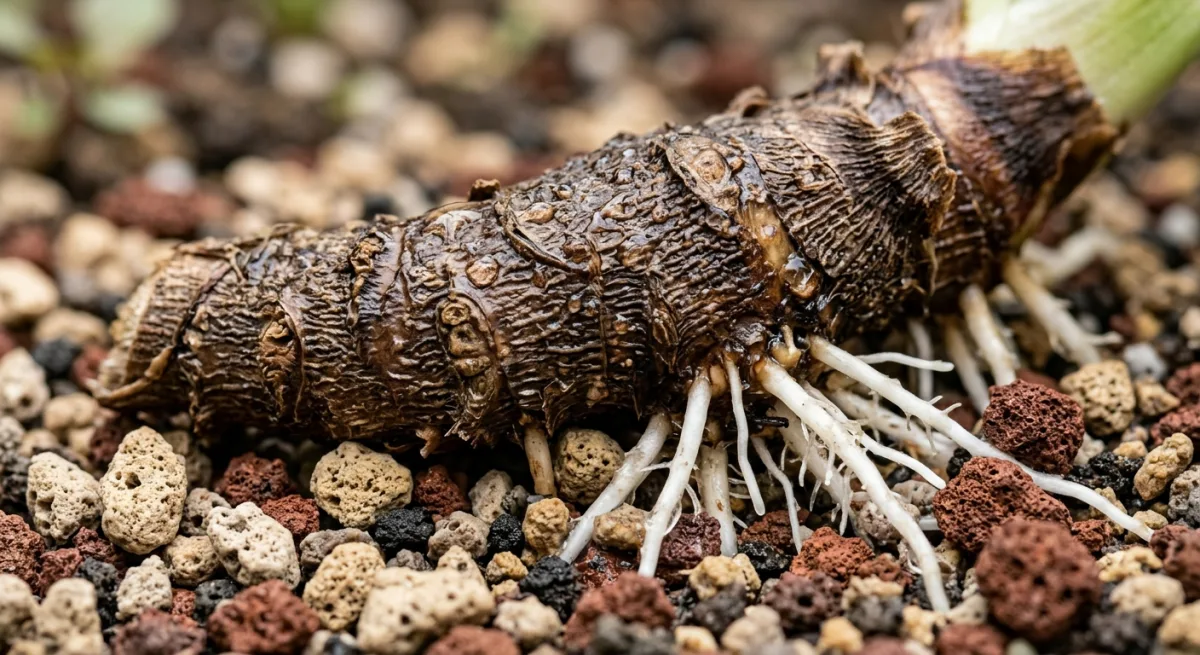
The root and rhizome vitality of potted irises depends far less on capillary microporosity than on macroporosity—the macro-pore volume that dictates gas exchange and oxygen diffusion rates. Iris root networks exhibit high respiratory oxygen demands; the fibrous feeder roots extending downward from the rhizome's ventral plane anchor onto mineral surfaces to optimize the moisture-to-oxygen interface. To construct a resilient, non-compacting root zone, incorporate the following primary inorganic components:
- Horticultural Pumice (3–6 mm): A porous volcanic silicate that holds moisture within its micro-cavities without becoming waterlogged. When integrated into an iris mix, it maintains its structural integrity without degrading, ensuring permanent aeration channels throughout the root zone.
- Crushed Volcanic Lava Rock (Scoria - 4–8 mm): Rich in iron, magnesium, and trace minerals, these angular basaltic particles add substantial physical ballast to the container, preventing top-heavy bloom stalks from toppling during blustery spring storms. Their vesicular, rough surface provides an exceptional substrate for rhizome anchor roots.
- Zeolite (Clinoptilolite - 2–5 mm): Boasting a remarkably high Cation Exchange Capacity (CEC), zeolite acts as a molecular nutrient reservoir, buffering excess fertilizer salts and absorbing excess ambient moisture, which it slowly releases back to root hairs on demand. It significantly curtails the proliferation of anaerobic, root-rotting fungal pathogens.
- Coarse Horticultural River Sand (2–4 mm): Fine builder's sand must be strictly avoided, as its minute grains pack tightly and turn the potting mix into impermeable concrete. In contrast, sharp, washed, coarse river grit facilitates rapid gravitational water evacuation, reducing the time rhizomes remain fully submerged to mere seconds.
2. Organic Matter Balance: Peat Moss, Coconut Coir, and Compost
In their indigenous habitats, wild irises thrive in lean, calcareous, rocky substrates low in organic matter. While a completely inorganic substrate in a container can dry out too rapidly under summer heat, the organic fraction must be meticulously calibrated in both volume and decomposition quality.
Coarse White Baltic Peat: The fibrous structure of professional-grade Baltic peat distributes moisture evenly. However, if allowed to desiccate completely, it can become notoriously hydrophobic (water-repellent). For container irises, select peat with a fiber length of 10–20 mm, avoiding finely milled peat dust.
Washed Coconut Coir (Coco Peat): Featuring a naturally stable pH (5.8–6.5) and superior re-wetting properties, coconut coir is an outstanding peat alternative. However, unwashed agricultural coir often harbors excessive sodium and chloride salts, which induce necrotic leaf-tip burn on irises. Always use premium, low-EC (electrical conductivity), thoroughly rinsed coir blocks.
Fully Matured Leaf Compost and Worm Castings: Fresh or partially composted barnyard manures are fatal to irises; their high free-ammonia content and active microbial decomposition create an open gateway for Pectobacterium carotovorum (formerly Erwinia carotovora), the pathogen behind bacterial soft rot. Only fully cured, sieved leaf mold or aged worm castings should be introduced, strictly limited to no more than 10% of the total soil volume.
3. Custom Substrate Formulations for Different Iris Species & Climates
The container adaptability of the genus Iris varies considerably across botanical groups. While dwarf bearded irises demand a gritty, sharply draining, alkaline-to-neutral medium, beardless species like Siberian or Japanese water irises tolerate—and even appreciate—higher moisture retention and mildly acidic profiles. The formulations below are calibrated to optimize root-zone oxygenation across varied garden settings:
| Iris Group / Species | Inorganic Aggregate (% by Volume) | Organic Fraction (% by Volume) | Target Characteristics & Substrate pH |
|---|---|---|---|
| Dwarf Bearded Iris (Iris pumila / germanica) | 40% Pumice (3–5 mm) + 20% Lava Rock + 10% Coarse Sand | 20% Coarse Fibrous Peat + 10% Mature Leaf Compost | Ultra-fast drainage, airy, circumneutral to alkaline (pH 6.8–7.5) |
| Siberian Iris (Iris sibirica) | 30% Pumice + 15% Zeolite + 15% River Grit | 30% Washed Coco Coir + 10% Long-Fiber Sphagnum | Moisture-retentive yet well-drained, slightly acidic (pH 6.0–6.5) |
| Dutch Bulbous Iris (Iris hollandica) | 35% Pumice + 25% Coarse Sand | 30% Baltic Peat + 10% Pure Worm Castings | High capillary aeration, moderate moisture, loose texture (pH 6.5–7.0) |
| Rock Garden / Aril Iris (Iris lutescens / oncocyclus) | 50% Pumice (4–6 mm) + 30% Crushed Limestone / Lava | 20% Screened Decomposed Pine Bark / Leaf Grit | Extremely mineral, xeric, maximum air permeability (pH 7.2–7.8) |
4. Container Material Selection: Terracotta, Glazed Ceramic, and Plastic
A planter's structural material dictates the thermodynamic and gas-exchange boundaries between the internal soil core and the external environment. Choosing an unsuitable container can compromise even the most masterfully blended potting mix.
Unglazed Terracotta (Earthenware): The undisputed gold standard for container iris cultivation. The microporous nature of fired clay allows moisture to transpire laterally through the container walls. This process generates evaporative cooling throughout the root mass during scorching midsummer heatwaves, preventing the rhizomes from literally baking inside the pot.
Glazed Ceramic and Porcelain: The vitrified outer glaze creates an impervious vapor barrier. Gas exchange and moisture evaporation in these pots occur exclusively through the upper soil surface and the basal drainage aperture. If using glazed containers, increase the proportion of pumice and lava rock in your mix by at least 15% to offset the lack of wall porosity.
Plastic and Synthetic Resin: While lightweight and budget-friendly, dark-colored plastic pots absorb intense solar radiation, frequently elevating root-zone temperatures beyond 45°C (113°F) in exposed locations. These temperature spikes denature the cellular membranes of tender feeder root hairs. If plastic must be used, opt for light-colored containers and verify they feature at least 4 to 6 generous drainage openings.
5. Step-by-Step Repotting, Division, and Root Pruning
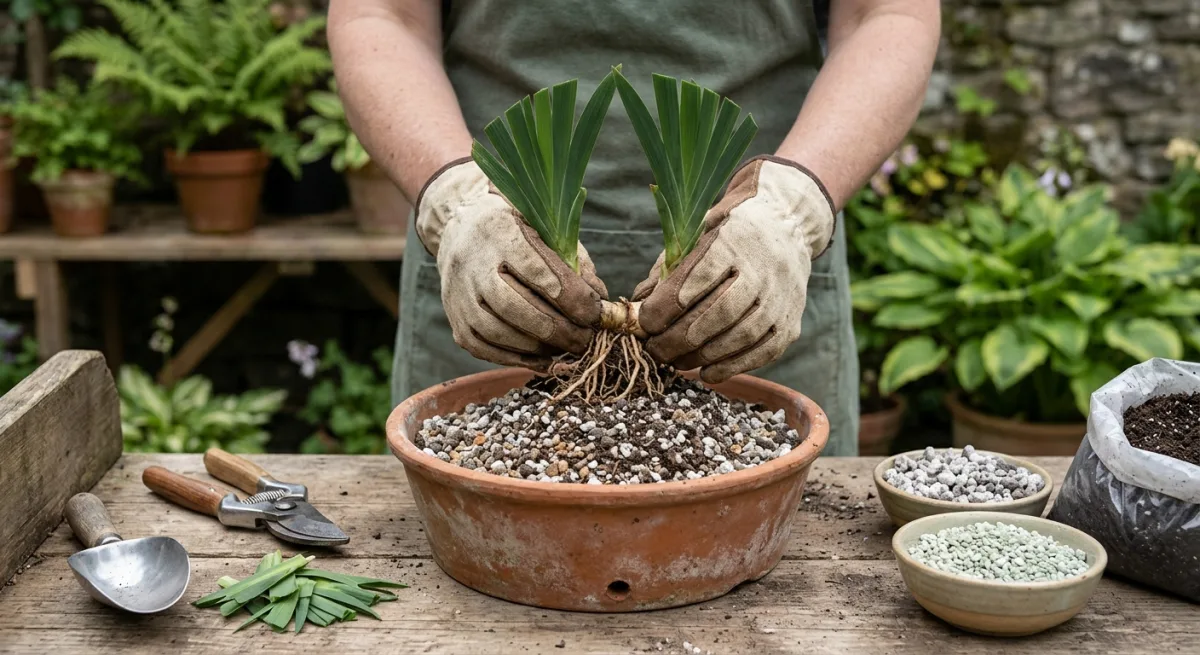
Due to the vigorous, lateral growth habit of iris rhizomes, container specimens require repotting, soil renewal, and crown division every 2 to 3 years. The ideal window for this operation is mid-summer to early autumn (typically July through September), roughly 4 to 6 weeks following the cessation of blooms, when the plant naturally prepares to initiate fresh root primordia.
- Unpotting: Two days after a thorough watering, turn the container gently on its side. Tap the outer rim firmly and ease the entire root mass out as a cohesive unit. Never pull forcefully on the leaf fans or rhizomes.
- Root Cleansing: Gently tease away the exhausted, salt-crusted old substrate using your fingertips or a gentle stream of water from a spray nozzle until the rhizome network is visible.
- Division and Culling: Using a razor-sharp, alcohol-sterilized pruning knife, sever and discard the old, woody, wrinkled 'mother' rhizome centers. Retain only the firm, plump, juvenile side offsets that exhibit healthy leaf fans and robust, light-colored root nodules.
- Root and Foliage Balancing: Trim overly long fibrous roots back to approximately 10–12 cm (4–5 inches). Cut the leaf fans back by two-thirds into an inverted 'V' (roof peak shape), roughly 15 cm (6 inches) tall. This pruning step significantly diminishes transpirational water loss while root anchorage is developing and prevents wind-rock from dislodging new root caps.
- Antiseptic Wound Treatment: Dust all freshly cut rhizome tissue generously with sulfur powder or activated charcoal. Allow the divided rhizomes to rest in an airy, shaded location for 24 to 48 hours to form a firm, protective suberized callus over the incisions.
- Planting Geometry: Form a firm, conical mound of your mineral potting mix in the center of the pot. Place the rhizome atop this pedestal, distribute the roots evenly down the slopes of the mound, and backfill with the remaining mix. Ensure the upper one-third of the rhizome's dorsal ridge remains exposed flush above the final soil line.
6. Critical Post-Repotting Care: The 'Dry-Rest' Protocol
A widespread and detrimental habit among indoor gardeners is immediately drenching a container the moment transplanting is complete. For irises, much like desert succulents, observing a strict 'dry-rest' period immediately after potting is your primary insurance policy against fatal infection. Even with careful handling, minute micro-fractures inevitably develop across the root and rhizome surfaces during division; wet substrate provides an open invitation for fungal and bacterial zoospores to invade these vulnerable wounds.
Withhold water completely for the first 3 to 5 days following repotting. Position the container in a bright, sheltered location with gentle air movement, completely protected from scorching midday sun and unexpected downpours. This dry buffer period stimulates rapid wound suberization and encourages root tips to seek out moisture by generating fresh, active root hairs.
Apply the maiden irrigation on the fifth or sixth day—slowly and deeply—until water flows freely from the drainage holes. Never allow stagnant water to pool in a decorative saucer underneath; empty drainage trays immediately. Throughout the autumn rooting phase, always allow the top 3–4 cm of the gritty substrate to dry thoroughly between waterings.


Reader Reviews & Comments 3 Reviews
Julian Montgomery
Marcus Vance
Eleanor Brooks
Leave a Review & Rating
Share your plant care tips, experiences, or questions with our succulent community.